New Appointment
When making a booking for an appointment, there may be a number of different screens that are presented. This can be dependent on whether the patient is a new or an existing patient and also what settings are configured for the Provider (see PROVIDER SETTINGS).
Booking a consultation
Select 'New' Appointment (or press Enter on a free time slot).
The Select Patient screen will display.
Patient Selection / New Patient
Either select a patient in the normal way, or select New Patient.
If New Patient was selected from the Select Patient screen, the following screen will display.
This is a cut down version of the main patient registration screen as normally a lesser amount of information about the patient is entered at the time of making the appointment.
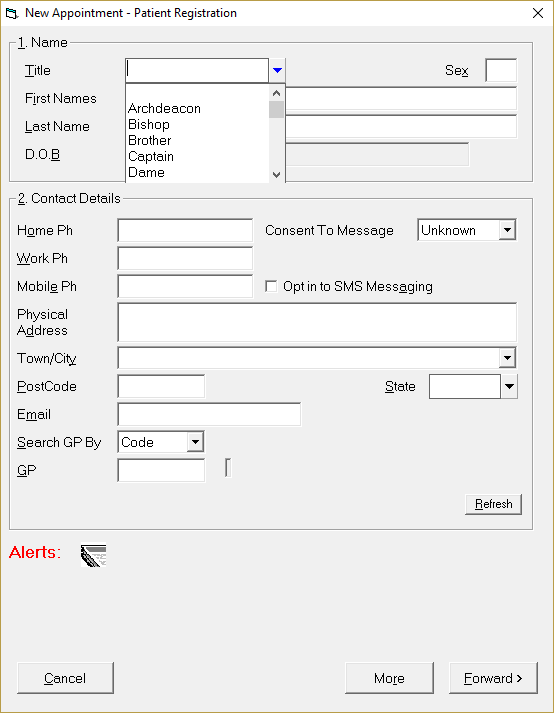
Providing 'Quick Appointments' is not enabled, a screen similar to the one below will display.
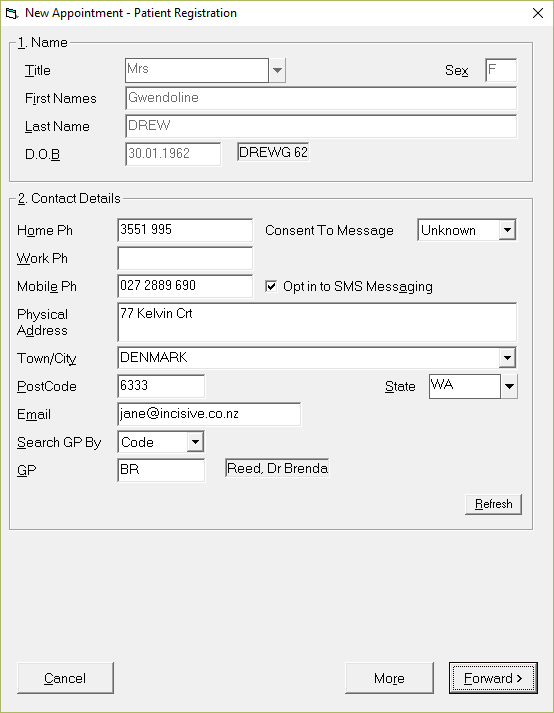
Amend any Registration details if required.
Select 'Forward' to move to the next screen.
Appointment Screen
Complete the details for the booking.
Select 'Forward' to progress to the next screen.
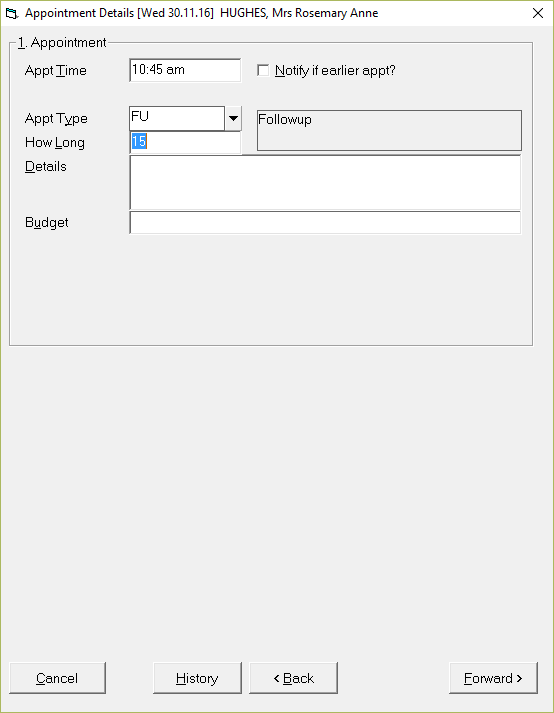
Appt Time | The time will default to that selected on the appointment screen. |
Notify if earlier appt? | If you want to put the patient onto a cancellation list, check this option on. Press Enter to toggle the selection on (and off). |
Appt type | Select the Appointment Type from the selection list. |
How Long? | The time required for the appointment will populate with the default for the Appointment Type. |
Details | Enter any details about the appointment if required. Check the box to the right of the Appointment Type. The text here may be all that is required, so the addition of text in the Details field may be unnecessary. |
Budget | If you are managing a Contract, and have Budget Codes set up, enter the Budget Code(s) here. |
Select Referral
If 'Quick Appointments' or 'Skip Referrals and ACC entry' is not enabled then after completing the previous screen, you will be prompted to select a referral, or, if there is not already a referral, enter a new referral.
- Existing appointments are listed with the most recent referral at the bottom of the list.
A warning message will display if the referral is due to expire.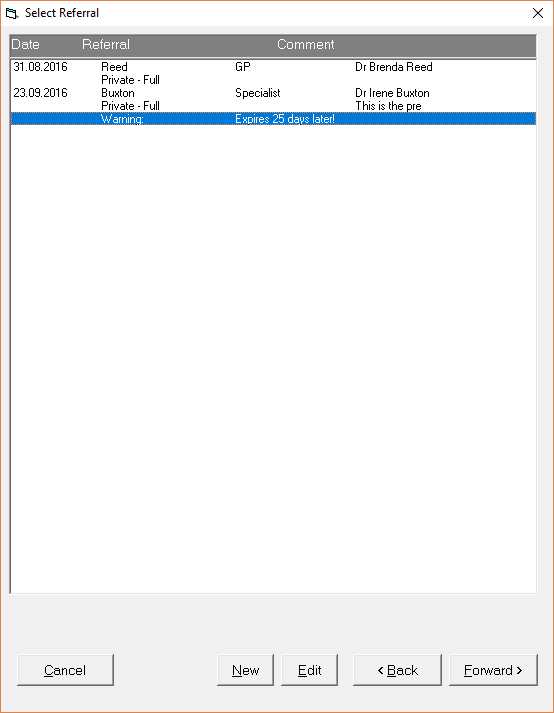
- Either select a referral by highlighting it and select 'Forward'; or
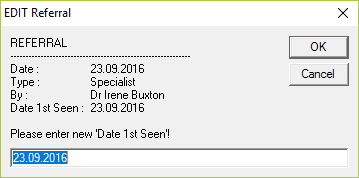
- Select a Referral and select 'Edit'
- Existing appointments are listed with the most recent referral at the bottom of the list.
New | To create a 'New' referral. |
Edit | This allows you to change the Date first seen for the referral.
When an appointment is made for a new referral, the 'Date first seen' is automatically populated with the date of the appointment (provided 'Quick Appointments', 'Skip Referrals and ACC' are not enabled). If the first appointment for the referral is then moved, ensure you use 'Edit' to change the Date 1st Seen' to match the date of the changed appointment. |
Back | To move back to the previous screen. |
Forward | To move forward to the next screen. |
- Complete the details on the 'New Referral' screen, refer to TO ADD A NEW REFERRAL for information about completing each field.
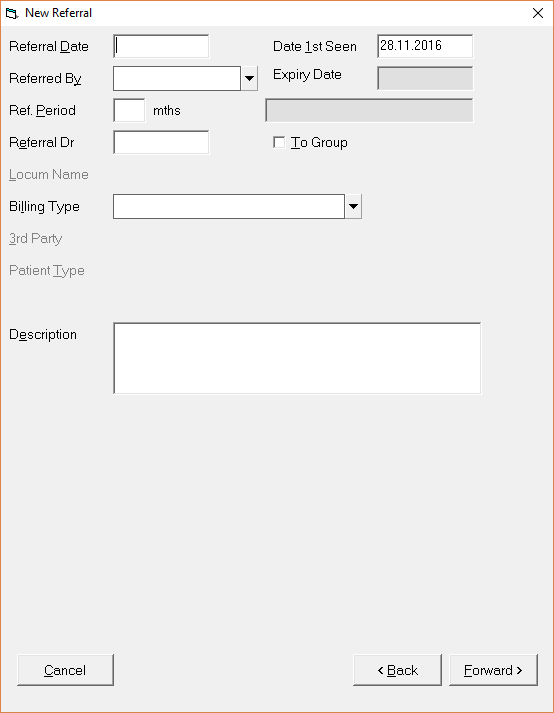
- Select 'Forward' to move to the next screen.
- Complete the details on the 'New Referral' screen, refer to TO ADD A NEW REFERRAL for information about completing each field.
The 'Date 1st Seen' field automatically fills with the date of the appointment.
Under normal circumstances, this information would not be altered when adding a new referral.
Claim
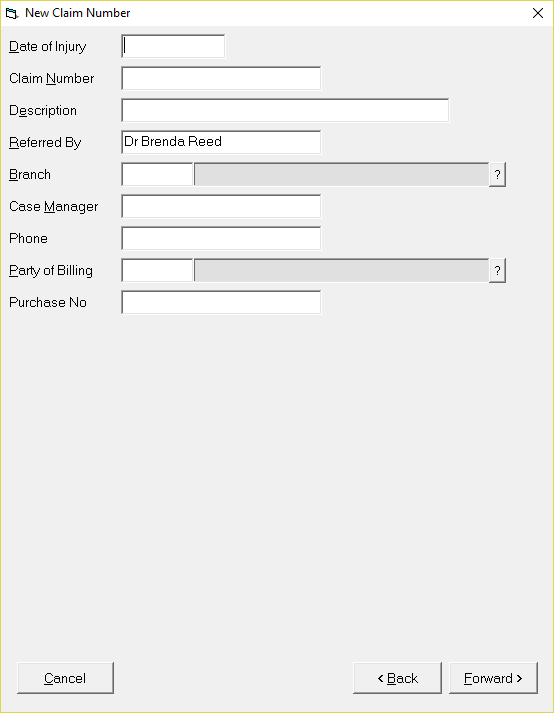
If the referral is accident related, and there is not already an existing claim registered, then the claim details will need to be completed.
- Enter the Claim details as applicable. Refer to TO REGISTER A NEW CLAIM NUMBER for information about the Claim fields.
- Select 'Forward' to progress to the next screen.
Resources Required
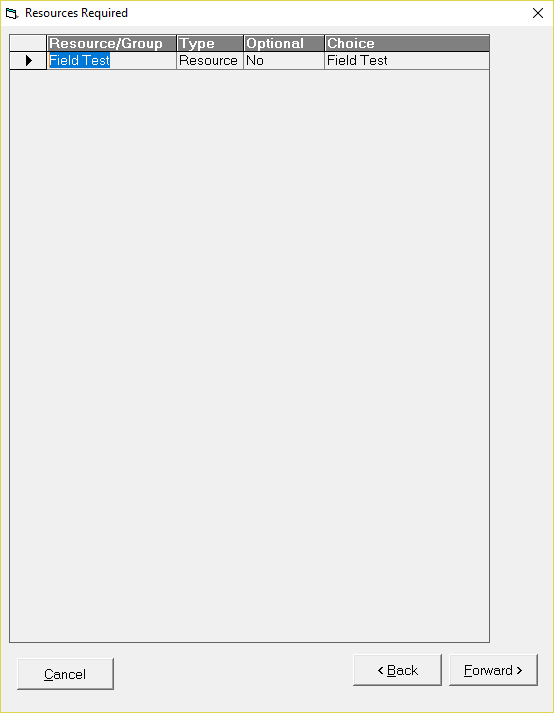
If the Appointment Type selected requires a Resource, then you will be required to confirm the booking of the resource.
- Select 'Forward' to book the resource and progress to the next screen.
Some resources allow for a selection of the resource. Make your selection before progressing to the next screen.
Make Appointment
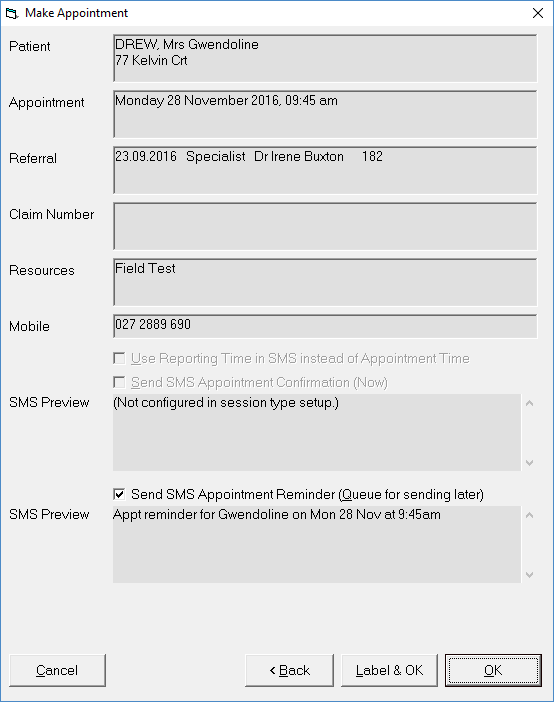
Patient | The patient details are displayed (to confirm that you have the correct patient selected). |
Appointment | The day, date and time of the appointment display (for reading back to the patient). |
Referral | The selected referral (if any) displays. |
Claim | The selected claim details (if any) display. |
Resources | The selected Resources (if any) display. |
Mobile | The patient mobile number (to be used for sending any SMS messages) will display. |
Use Reporting Time in SMS instead of Appointment Time | If the reporting time or resource booking start time differs from the actual appointment time, this option will be checked on by default. |
Send SMS Appointment Confirmation (Now) | If the session is sent to send an immediate SMS to confirm the appointment, this option will be checked on. |
SMS Preview | A preview of the SMS to be sent will display.
|
Send SMS Appointment Reminder (Queue for sending later) | If the session is set to send an SMS Appointment Reminder, this option will be checked on. The SMS message will be queued a set number of days prior to the appointment as configured for the session (see SESSION TYPES.). If the number of days prior to the appointment is changed for the Session, this will not change SMS messages already queued for a particular date. |
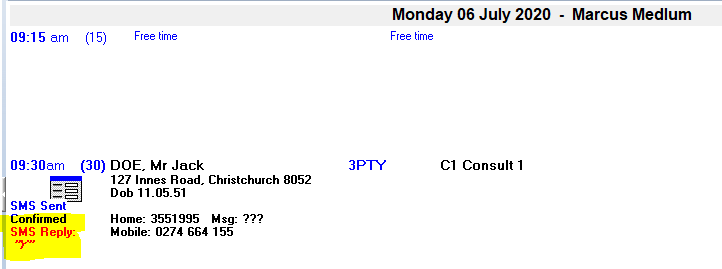
SMS Reply | If you are using the option to have replies come in for your SMS they will be displayed in the appointment book. You can see them more clearly by selecting the spacebar to expand the details.
|


Label & OK
If you require an Appointment Label to give or send to the patient, select 'Label & OK'.
An Appointment Label will print and the Appointment will be saved.
OK
To save the Appointment, select 'OK'.
Booking an operation
Booking an operation is similar to making an appointment however there are a few additional fields that you may enter information in.
Regardless of the PROVIDER SETTINGS, an operation requires a referral to be either selected or entered (if not already done so). The options for Quick Appointments and 'Skip Referrals & ACC' are not relevant when booking an operation.
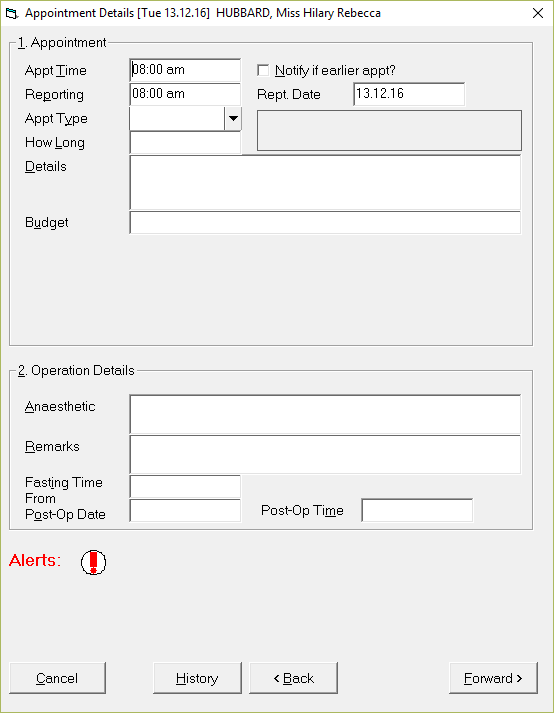
Reporting | The reporting time will default to either the Appointment Time or the default reporting time for the session (if entered). |
Rept. Date | The reporting date will default to either the Appointment Date or the default reporting date for the session (if entered). |
Operation Details | |
Anaesthetic | Enter details of the Anaesthetic, i.e. GA, LA, Arm Block etc. |
Remarks | Additional remarks regarding the booking can be made here, i.e the equipment required etc. |
Fasting Time | If you are sending a template/form letter that includes a merge code for the fasting time, enter it here, otherwise leave this field blank. |
From Post-Op Date | If you have made a booking for a post operative appointment, enter the date here. This will print on a template / form letter if the merge field has been used. |
Post-Op Time | If you have made a booking for a post operative appointment, enter the time here. This will print on a template / form letter if the merge field has been used. |
On This Page:
- New Appointment
- Booking a consultation
- Booking an operation
- Reporting
- Rept. Date
- Anaesthetic
- Remarks
- Fasting Time
- From Post-Op Date
- Post-Op Time
- Appointment Confirmation
- Cancel a Clinic
- Change an Appointment
- Create or Roster a Session
- Delete Appointment
- Deleting multiple sessions
- Find 1st Free Appointment
- Link Session to a Facility
- Make a further appointment
- Make an Appointment
- Notify
- Print a Session
- Print Labels for a Session
- Referral Entry
- Reorder Appointments
- Resources - Configuration
- Resources - Stop double-booking of treatment room
- Search
- Sending an Appointment List
- Setup New Session Type
- Share an Op list with Anaesthetist - using inTOUCH app
- Transfer Appointment to/from Wait-list
- Transfer Session
- Waiting Lists
Training: