Sessions are a group of a particular set of Appointment Types at a particular location. e.g. a Clinic Session, or an Operating Session.
Ideally you should have a different Session Type for each hospital you operate at, and for each location that you consult at.
In addition to this you may distinguish sessions between the Day Surgery Unit and the main theatre at the same hospital. This will make it easier to identify operating time on your calendar. You can also use Session Types to specify that only Followup appointments and Post Operative appointments are to booked.
To add a New Session Type
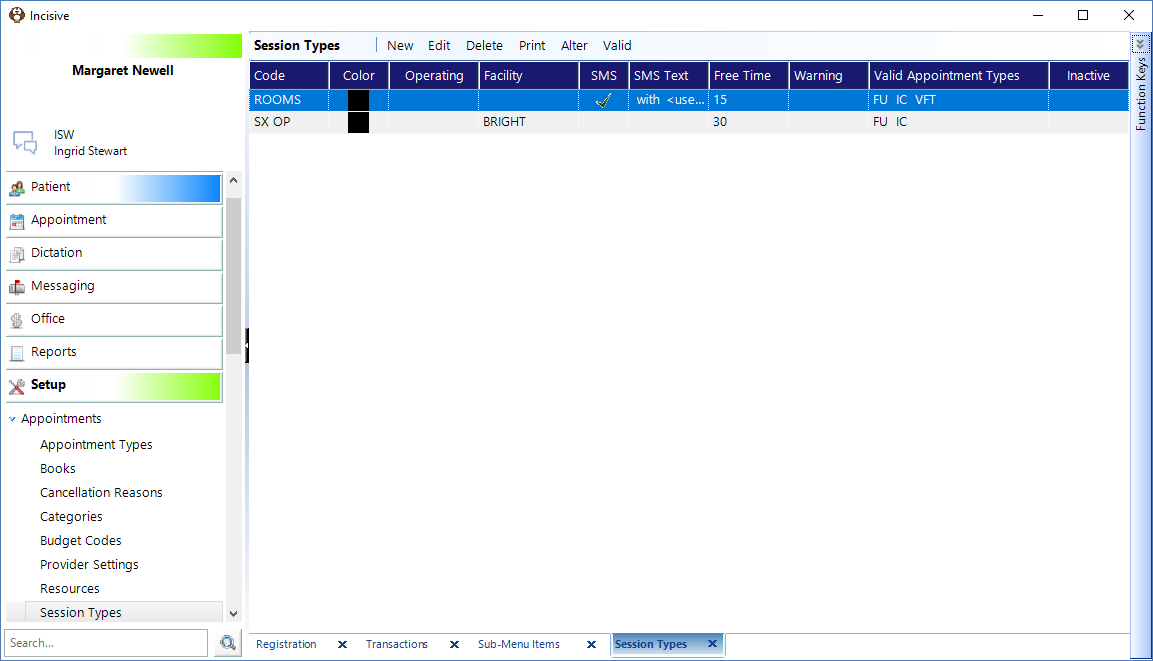
Setup - Appointments - Session Types
- Select 'New'.
- Enter the data as applicable for the session type that you are creating.
- Select 'OK' to save the new Session Type.
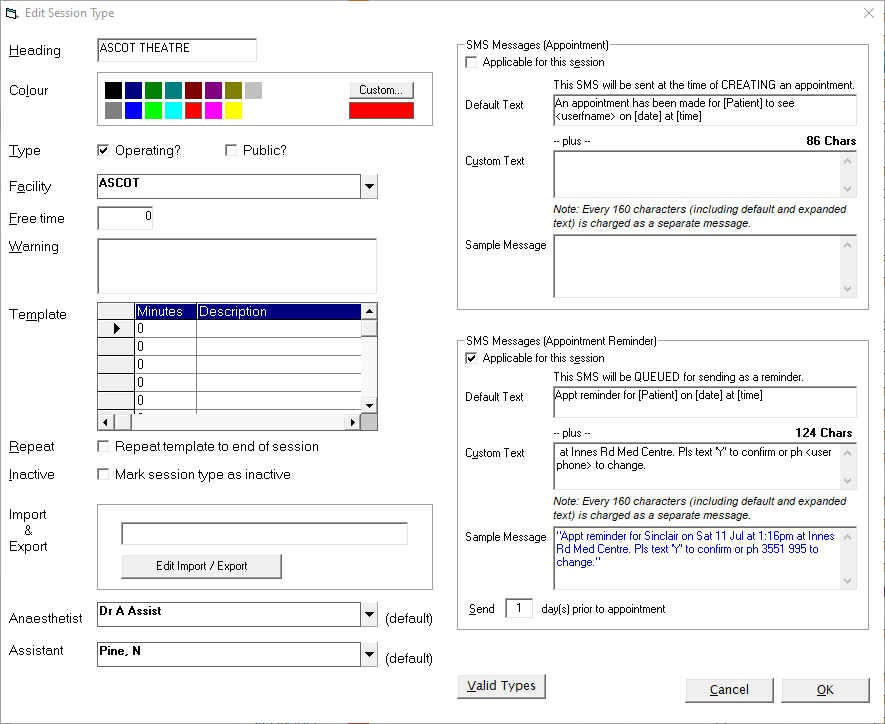
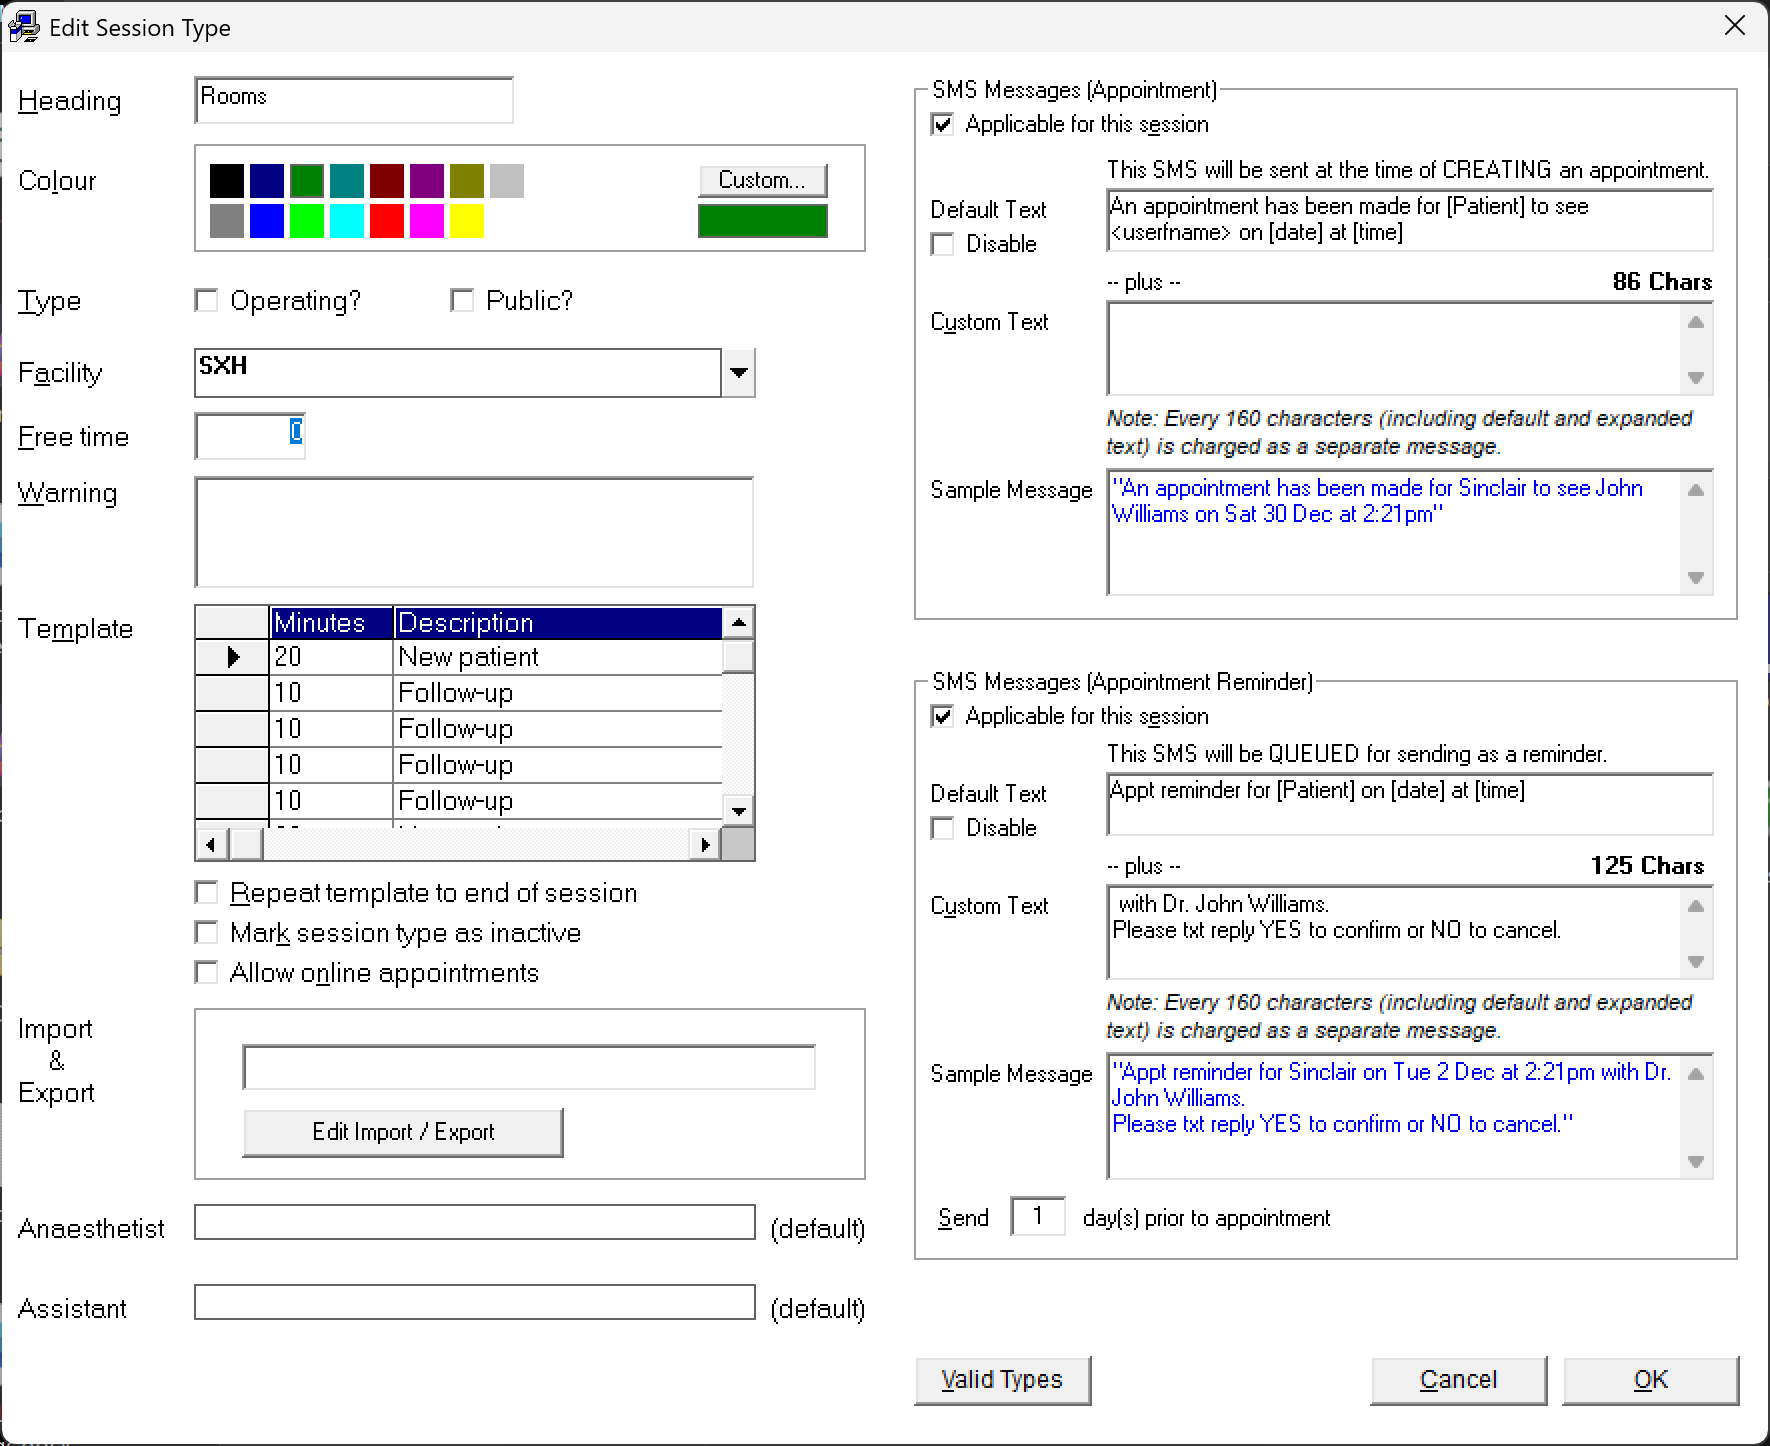
Heading | Type the Heading for the Session Type, e.g. CLINIC. | ||||||||||
Colour | Select the colour that the Session Type is to display in on the Calendar. | ||||||||||
Type | If the Session Type you are adding is an Operating Session, check the Type box. This allows you to record more detail at the time of making the appointment e.g. the operation name and the anaesthetist. | ||||||||||
Public? | If the session or list is a Public Hospital one, then select this option. When searching for the first available appointment, public sessions can then be filtered for. | ||||||||||
Facility | If you have address codes set up belonging to a category that is marked as a Clinic / Operating Session then select the relevant entry from the drop down list. This enables you to use merge fields in Form Letters that utilise the facility details. This avoids the needs to have different admission letters for each hospital, or to cut out text as the appropriate details can automatically be included in the letter without the need for operator intervention. | ||||||||||
Free time | If you require the Session to be divided into appointment time slots, enter the number of minutes for the time slot here, e.g. 15, otherwise leave it blank. | ||||||||||
Warning | If you require a warning message to appear every time you make an appointment in this Session Type, type the text of the warning in this field. This is particularly useful when you consult at a number of different locations and staff are to be reminded of the location so appointments are not inadvertently booked into the wrong location. | ||||||||||
Template | If bookings are to be made in a structured way you can set up a template. This is in the background and should be regarded like lines-on-a-page. For example, prefer an Initial Consult at the start of every hour then review or follow-up consults between. You can still over-ride the suggested appointment type. | ||||||||||
Repeat | If you want the template repeated to the end of session tick this field. Enter the first few appointment periods then check this on to repeat the entries for the rest of the session. | ||||||||||
Inactive | If the Session Type is no longer required (and it cannot be deleted because it has been used), check this option to mark the session as inactive. | ||||||||||
Import /Export | Sessions are linked to a surgeon (sub-contractor) and can be imported or exported from other databases. | ||||||||||
Anaesthetist | If your session type is an Operating Session you can choose your default Anaesthetist to appear in your session. | ||||||||||
Assistant | If your session type is an Operating Session you can choose your default Assistant to appear in your session. | ||||||||||
Valid Types | Appointment Types need to be validated to a session (or sessions). Select the Appointment Types that are valid for the Session Type being added (or edited). | ||||||||||
SMS Messages (Appointment) | An Appointment confirmation message can be sent (immediately) at the time of making an appointment. This differs from the Appointment Reminder SMS that is sent out a set number of days prior to the appointment.
| ||||||||||
SMS Messages (Appointment Reminder) | An Appointment Reminder can be queued at the time of making an appointment. This differs from the Appointment Confirmation message above which is sent immediately that the appointment is made.
|
To edit an existing Session Type
Setup - Appointments - Session Types
- Select the Session Type to alter.
- Select 'Edit'.
- Make the changes.
- Select 'OK'.
Deleting multiple Sessions
Once a Session has been added to the Appointment Book in bulk, i.e. every week for a year or more, changes to the Session (start / finish times etc), either have to be individually made, or the sessions can be deleted in bulk (if not in use) and you can start afresh.
'Alter; allows you to bulk delete sessions.
Setup - Appointments - Session Types
- Highlight the Session Type that you want to delete Sessions for.
- Select 'Alter'.
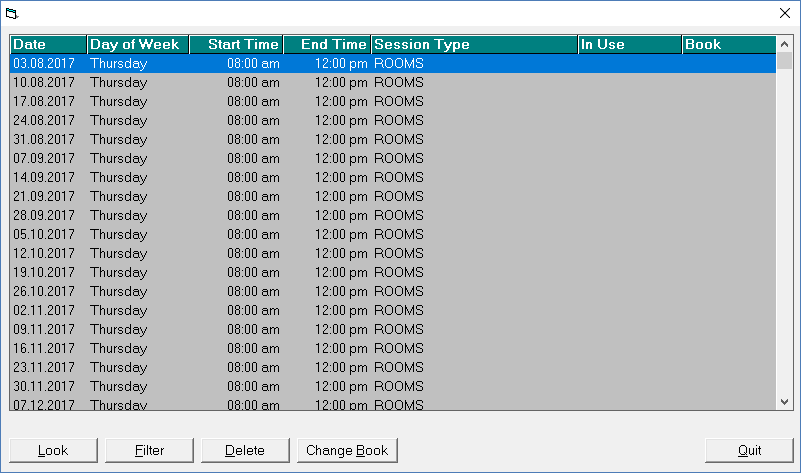
- Click on the relevant column heading to sort the sessions into an appropriate order, i.e. Day of week will sort the Appointment Book Sessions if this is applicable.
- Highlight sessions by using Shift + Up / Down Arrow or Shift + mouse to drag and highlight sessions.
- Select 'Filter'.
This will leave the previously highlighted sessions on screen (plus any that are in use). - Continue to sort and filter until you are left a list of Sessions to delete.
- Highlight the sessions to be deleted by using Shift + Up / Down Arrow or Shift + mouse to drag and highlight the sessions.
- Select 'Delete'.
- Type DELETE to confirm the selected sessions are to be deleted.
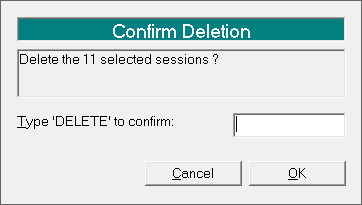
- Select 'OK'.
To Validate Appointment Types for a Session
Before you can make an Appointment into particular session (see Set Up > Appointments > Session Types), you must first define what Appointment Types are valid for the Session. You must first set up your Appointment Types, then your Session Types before you can validate them.
- Select the Session Type you wish to define valid Appointment Types for.
- Select Valid.
A screen similar to the one below will display.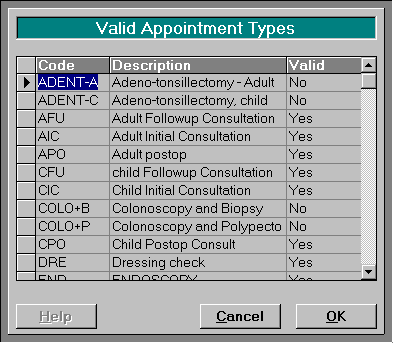
- A list of all Appointment Types will display on the screen. By default these are all set to Yes. Each Appointment Type may either be set to Yes, No or Maybe.
- Click on the Valid field for the particular Appointment Type you want to alter.
- Select 'Yes' if the Appointment Type will be required for this Session Type, or Select "Maybe" if you would not normally allow the appointment type, but might if it were urgent.
- Select 'OK'.