The Scanned Document option that is found in the Select Note options screen, is intended for documents that you have been sent, for instance as an attachment to an email and need to be saved to be linked into the patient file. This will save you from printing the document and then scanning it.
Patient - Notes - New - External Document
To attach an External document to the patient file
- From the 'Select Note Options' screen select External Document.
- Select 'OK'.
The Load Scanned Document screen will display.
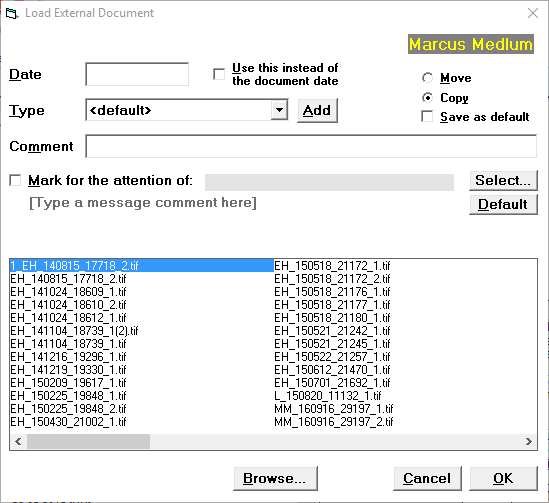
Select the file to be loaded to the patients file (or browse to a different location and select the file).
- Select 'OK' to save the selection.
Date | If you leave the date field blank, the date will be taken from the (external document) file date. | ||
Type | Select the external document type from the drop down list. This list is the same as for Scanned Documents.
| ||
Comment | To add an additional comment about the External Document, type the details here. | ||
Move | The file will be moved from the current location to the Allocated scanned document folder for the current Provider. | ||
Copy | A copy of the file will be made and placed in the Allocated scanned document folder for the current Provider. | ||
Save as default | This will save your selection of Move or Copy as the default. | ||
Mark for the attention of | Select 'Mark for the attention of' and select the Operator, if you need to bring the document to the attention of another staff member or doctor. | ||
Display of files | The list of files that displays, by default, are the files in the Scanned Documents - Unallocated folder. If this is not the correct folder, select 'Browse'. | ||
Browse | Selecting Browse will allow you to navigate to the location of your scanned documents. To quickly navigate to the location of these files have your hardware technician map a network drive (if the location of these files is on the server. Alternatively, save the files to your desktop, or a folder on your desktop. | ||
Cancel | To abandon the current input and return to the Notes tab select 'Cancel'. | ||
OK | To save the currently selected scanned document to the patient's file (against the currently selected Provider), select 'OK'. |
You (or anyone else) must not have the document open that you are trying to load to a patients file.
Emails and Email attachments
If you have received an email and want to save a copy of the email to the patient file, while you can use the 'copy and paste' function, some of the formatting and images may be lost. Instead, you could save the email and then load it as an External Document.
To save the text of an email to the patients files
To quickly save an email attachment to your desktop
- Open your email.
- Drag and drop the attachment to your desktop or a folder on your desktop.
On this page: