On this page: | Related: |
Templates is the name given to master documents that are then used to generate customised letters, operative reports, patient handouts and labels.
We have split this into a number of distinct areas:
Forms, separated to text-based Letters or template pro-forma with pdf or image backgrounds, which are intended to be used for Administrative purposes, such as Patient Handouts, Estimates / Quotes, Appointment Confirmation Letters etc.
Letters, which includes any templates of a clinical nature, i.e. as dictated by the doctor or provider.
Labels
Worksheets
There are a number of features that are available in all of the above areas, so they will be expanded on here.
RE: details
You can automatically enter patient details in the letter by creating a QuickCode called RE.
re: | <fullname4> DOB: <dob> |
<address(1-2)> | |
<address(3-5)> | |
Ph: <pat_phone_nos> PhW: <workphone> PhM: <MobPhone> | |
Claim: <claim no.> |
Merge Codes
Merge codes are merge fields that you insert into your templates in locations you want information from your Incisive database to appear. Each merge code represents a piece of information that will be retrieved from the database and merged into the template when the template is selected.
For more information on Merge Codes see F9 MERGE CODES.
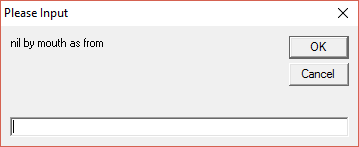
Prompts (for keyboard fill in)
The use of prompts in the templates stops and allows the operator to type something. After typing the text and pressing the Enter key the template continues to either the next prompt, or a Pick List.
How to enter a Prompt
Use the less than (<) and greater than (>) symbols to start and finish the prompt, i.e. <nil by mouth as from>.
Pick List
A Pick List offers a series of choices from which to select. As with the prompt, the less than (<) and greater than (>) symbols are used to start and finish the Pick List. Each choice is separated by // .
i.e. <left sided//right sided//bilateral>.
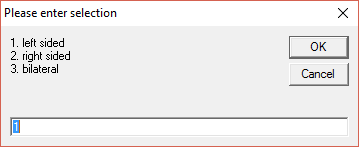
If you are using pick lists with the same information, ensure that you always enter the prompts in the same order so that the same number is always used for the same selection.
Jump Points
Jump points are inserted into a Template by entering two hatches, i.e. ##. When you select a template with a jump points, these come after the completion of any merge codes, pick lists or prompts.
The entire text of the template will appear on screen with the cursor at the first jump point (the ## have been removed). Type what you require at this point and when finished, press F6 (tag Function key) to move to the next jump point. If the hatches are not highlighted, press F6 a second time. The text you type will then replace the hatches.
Don't forget that you can use other templates (F8 codes) at your jump points as well.