There are two steps to entering a payment.
- Entry of the payment (deposit / banking)
- Allocation of the payment to the relevant invoices or account ledgers.
You will be stepped through the process.
Entry of the payment amount
Select 'New'.
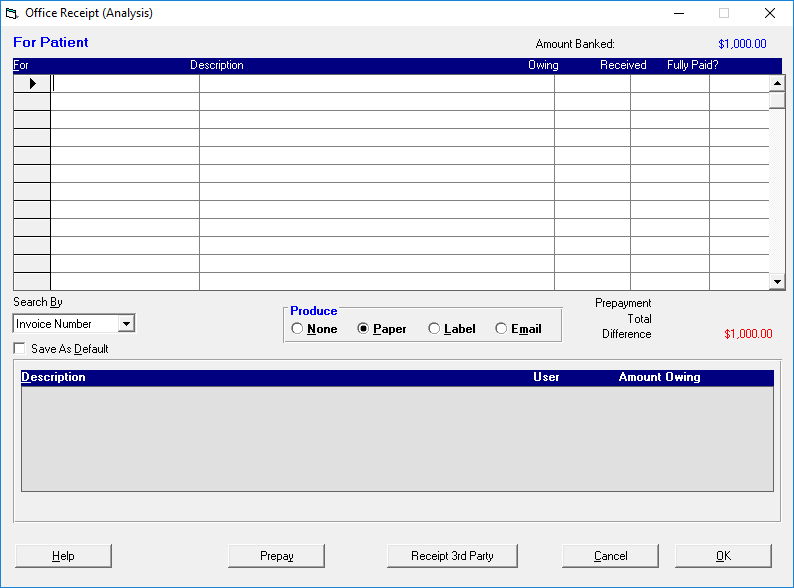
A screen similar to the one below will display.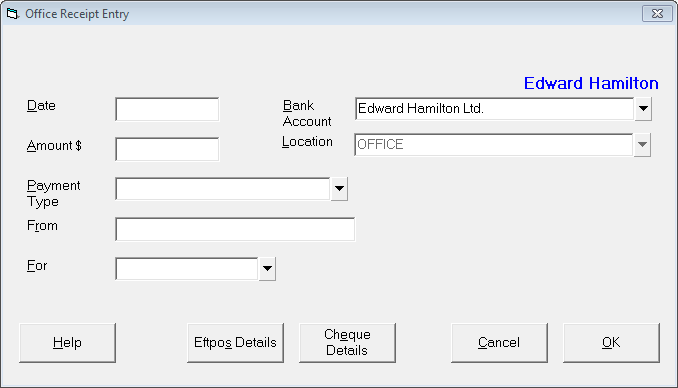
Complete the details as required.
Select 'OK'. Depending on the 'For' option selected, different screens will display.
Date | Enter the date of the payment. If you are entering a Direct Credit, this will be the date the payment was deposited to the bank account and if you have a Remittance Advice, this will show as the Payment Date. If you are entering cash, cheque or EFTPOS, this would normally be today's date. Press Enter for today's date. | ||||||||||
Bank Account | The default bank account displays. Select a different bank account if the money is to be deposited to other than the default account. | ||||||||||
Amount | Enter the amount of the payment. This is the total amount banked. | ||||||||||
Payment Type | Depending on what type of payment you are receipting, select one of the options from the list:
| ||||||||||
From | Type who the payment is from, if the details have not been filled in from the cheque details entered above. | ||||||||||
For | A receipt may be to to pay off either patient invoices, third party invoices, (or a combination of patient and 3rd party), or schedules. Alternatively it may be to receipt some other income eg interest or salary. Select from:
| ||||||||||
Location | This will display the location selected at the time of logging in. Banking is Location specific so payment types of Cash, Cheques, EFTPOS and Manual Credit Cards will be recorded against a supplement for the location specified. | ||||||||||
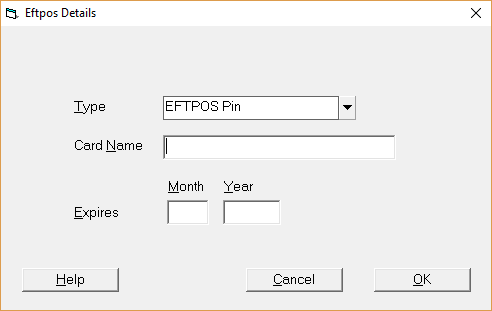
EFTPOS Details | If the Payment Type selected above was EFTPOS, this option allows for the editing of the details entered.
| ||||||||||
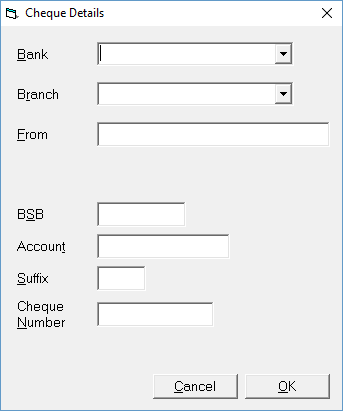
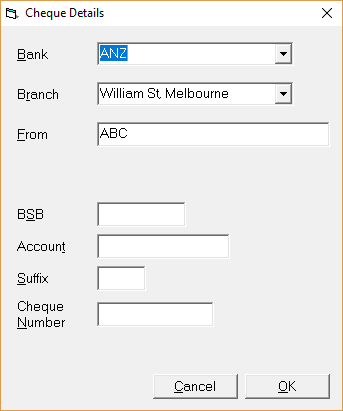
Cheque Details | If the Payment Type selected above was Cheque, this option allows for the editing of the details entered.
|
Allocation of the payment to Invoices
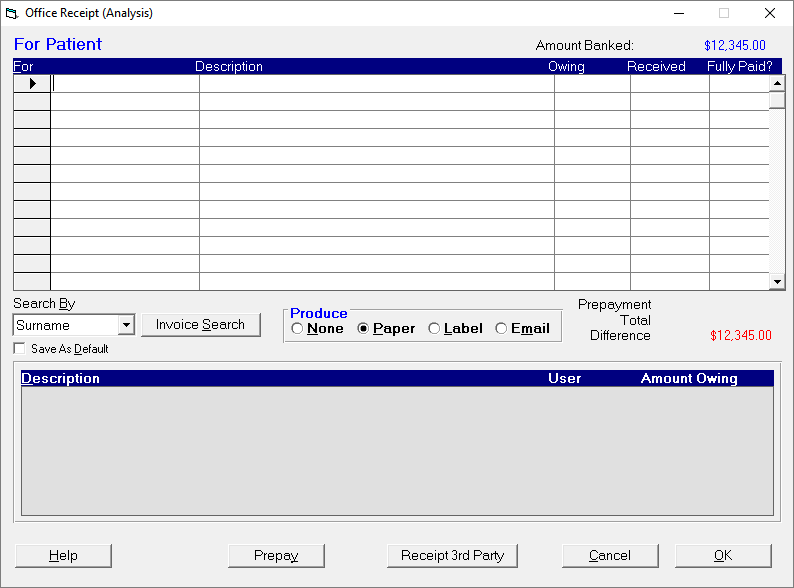
The most efficient way to allocate the payment received is by invoice number, if this is known. Type the invoice number or one of the Search by options listed below in the first column, followed by pressing the Enter key to search for the invoice.
The screen is in two parts:
- The top part is a grid where the patients / invoices are entered and display once selected.
- The bottom part of the screen will display a selection list if the information entered in the grid is not sufficient to identify the invoice to be paid off.
Search By | Depending on the information to hand, the Search by method selected may vary. Select from one of the following options: |
Claim Number | Select this option to search by the patients claim number. |
Date of birth | Select this option to search by the patients date of birth. |
Filing number | Select this option to search by the patients Filing number. |
First name | Select this option to search by the patients first name (or part thereof). |
I.D. Code | Select this option to search by I.D. Code. (or part thereof). |
Surname | Select this option to search by the patients lastname (or part thereof). |
Invoice Search | Selecting Invoice Search will allow you to search across all Providers for the entered invoice number. |
Produce | When the allocation is complete select whether a receipt is required |
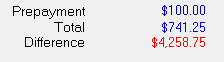
Where there has been an overpayment of an invoice or invoices, prepayments can be entered to make the amount paid balance with the amount allocated as the two must balance in order to save the receipt. | |
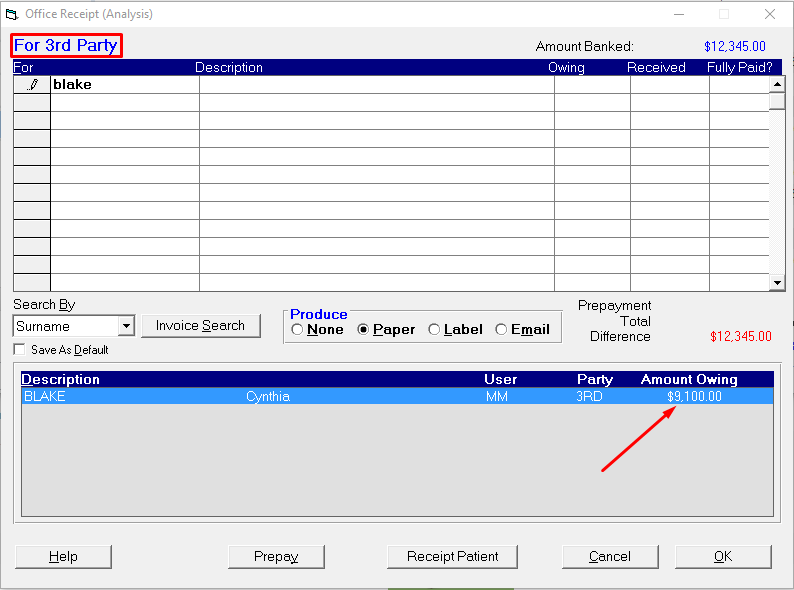
Receipt Patient | This allows you to toggle between searching for invoices produced for the Patient or invoices produced for a Third-Party. |
Payments for Patient & Third-Party Invoices
Patient and Third Party outstanding balances are almost identical to receipt. The differences are:
- if Third Party is selected, then the list of patients that displays at the bottom of the screen will be only those patients who have amounts outstanding to a Third Party
- if Patient is selected, then the display will be only those patients who have amounts outstanding themselves.
Obviously patients may have both Third party and patient amounts outstanding so you can toggle between Patient and Third Party invoices by selecting the 'Receipt Patient' or 'Receipt Third Party' button at the bottom of the screen.
- Complete the Payment details, selecting either for 'Patient' or 'Third Party'.
Search for the invoices that are going to be paid
The amount banked displays in the top right hand corner (providing an amount was entered) with the difference to be receipted in the middle right of the screen
Use the Search By selection to choose how you want to search for the invoice
Select Surname, ID Code, DOB or Firstname if you are paying off multiple invoices for a patient
Select Invoice Number if you are just paying off a single invoice
- In the first column (For):
- Type up to three characters of the patients Surname, ID Code or Firstname and press Enter; or
- Type the Invoice number if known and press Enter.
A list of possible patients to receipt appears at the bottom of the screen.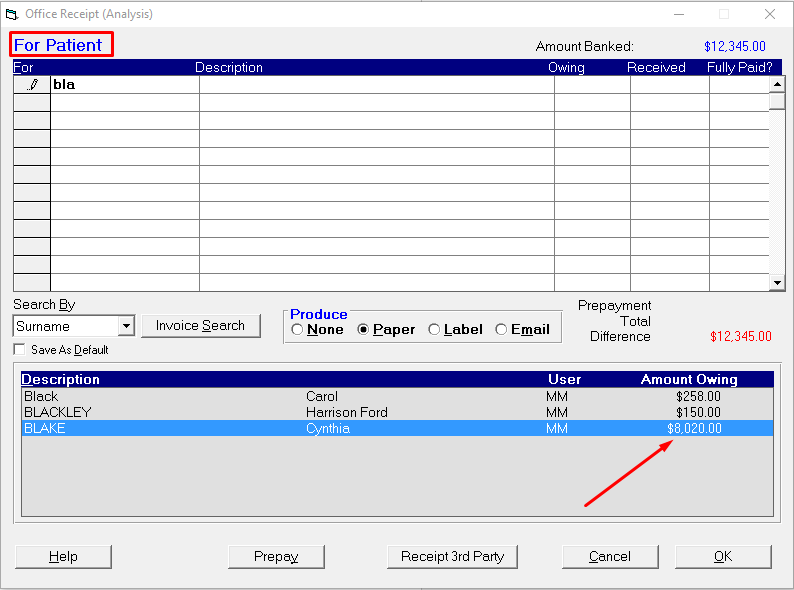
- Select the appropriate patient and press 'Enter' or double-click on the patient name.
The patients name and amount owing appears in the grid. Press' Enter' to accept the amount received, or type the amount in the Payoff column if it is different.
If there are multiple invoices for the patient you will be allowed to enter the amount you want to allocate to each invoice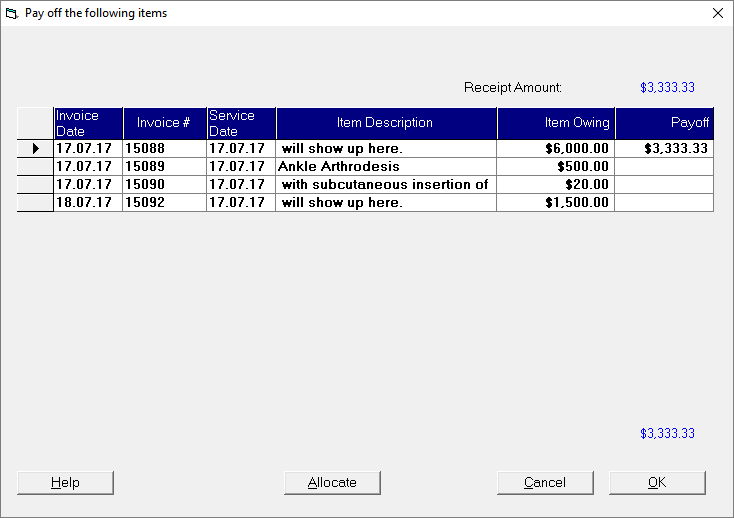
If the amount owing on an invoice is not Fully Paid it will automatically select No

- Continue receipting further patients or switch to search for invoices produced for a Third-Party
Select the Receipt Third Party button and continue again from Step 4.
You can toggle back and forward between Patient and Third-Party when allocating the payment to invoices.
When the Amount Banked has been fully allocated and there is no Difference you can select 'OK' to process the receipt.
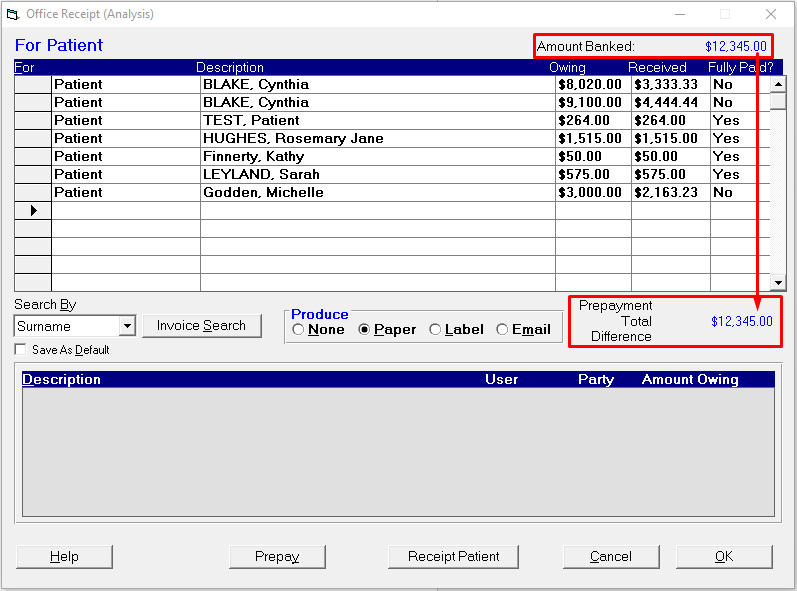
The receipt will not process if the amount banked does not add up to the total receipted for all patients.
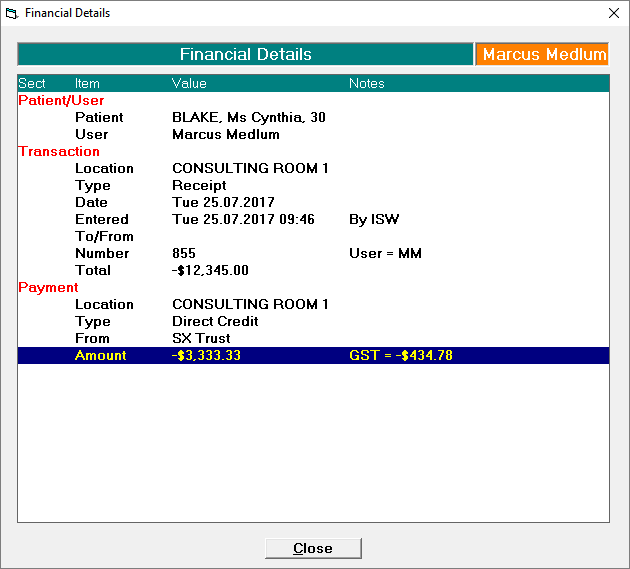
The total payment and the amount allocated to the patient will appear in the patient's Financial records

If the payment is banked into a different Providers account (e.g. Joint Practice account) the receipt will appear in the patient's financial transactions as a Credit Payment.

Pressing the Spacebar on the patient's receipt entry will show further details of the payment and allocation
Double-clicking on the patient's receipt entry will provide a report of the patient's financial transactions
Payments from Debt Collectors
Other Payments
An "Other Receipt" is normally something that is not patient related, ie hospital salary, Interest & Dividends received, refunds on purchases.
If you are a new SPM user, then you can use this to receipt payments for pre SPM services (patient & Third party invoices and schedules). Once an invoice or schedule has been generated by SPM, then this option should not be used, otherwise the invoice or schedule will still be regarded as being unpaid and will appear as a Debtor.
- Complete the Office Receipt Entry Screen as detailed previously, selecting 'Other' from the "For" picklist.
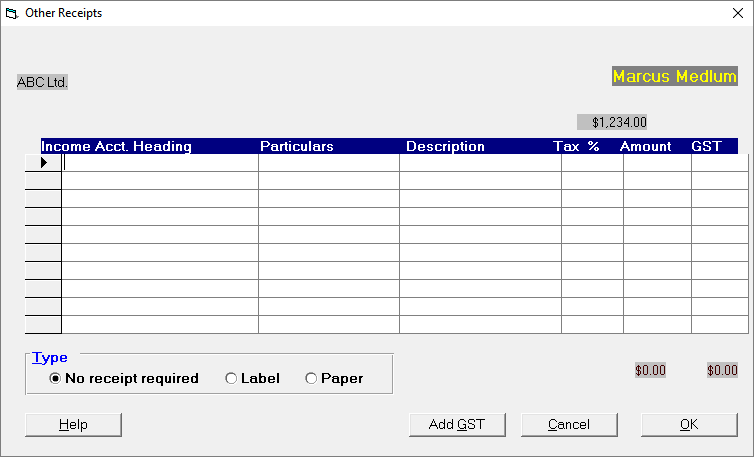
- Press F8 to display a list of Income Headings.
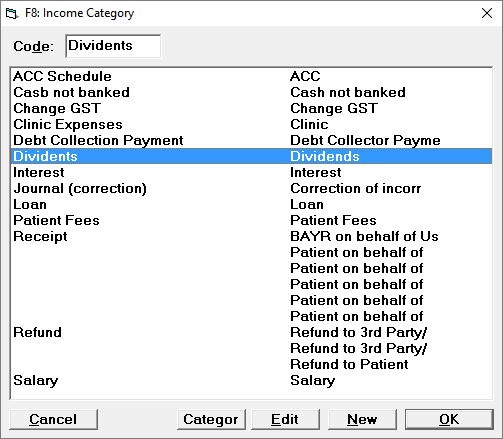
"Other" Receipts are analysed into Income Account Headings and Secondary Headings (see Set-up > Financial > Charges > Invoice Categories). - Select the appropriate Income Category (add a new one if required).
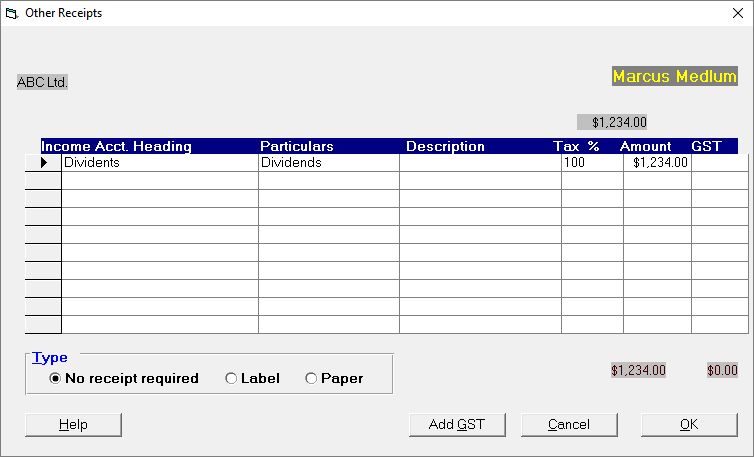
The Income Account Heading and the Particulars will be filled in automatically based on the Income Code selected. - Enter a description if necessary, alternatively leave this field blank.
The Tax % column relates to whether or not the Income Code selected is tax deductible or not. - Press 'Enter' to accept the default % for the selected Income Code.
The amount column displays the amount of the receipt less any amounts already allocated to other Account Codes. - Press 'Enter' to accept the amount or type the amount you want to allocate to the selected Income Heading and press 'Enter'.
The amount at the top of the column must equal the amount at the bottom. - Continue allocating to further Income Categories as required.
- Select the appropriate receipt type (none; label; paper).
- When the amount allocated equals the amount of the receipt, select 'OK'.
If the amount receipted does not match the amount allocated then the following message will display.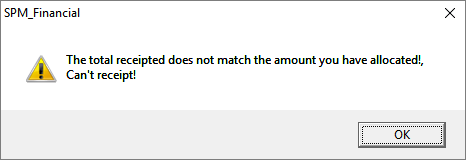
- Select 'OK' to return to alter the amounts allocated or make more allocations as appropriate and select 'OK' when the amounts allocated equals the total.