SMS messages can be either sent immediately or queued to be sent at a future date.
Send a SMS message now
Messages can be sent to patients on an ad-hoc basis that enables you to inform them of matters relating to their appointment with you.
Examples of these message types are:
- Notify patients yet to arrive that the specialist is running x minutes late
- Reminder for patients to send admission or consent forms back in.
- Inform patients that their test results are normal
Ad-hoc SMS messages
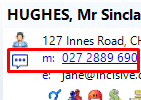
- From the patient header in Patient and Dictation you can click on the mobile number or the icon
- Type in the message you want to send
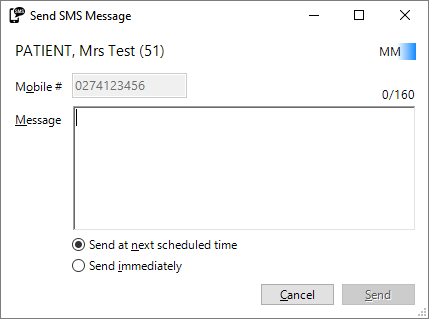
- or click in the message text area and press the F8 key to get the 'Quick-codes' that have been set up for use in this function.
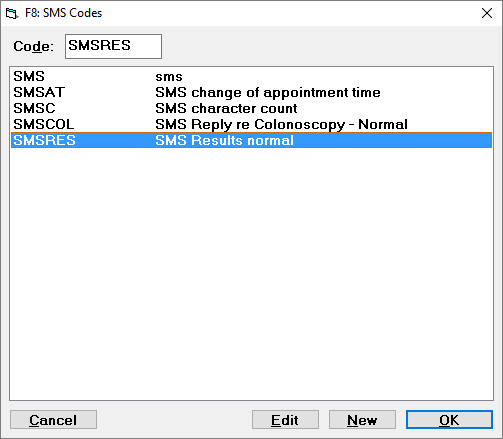
- Select the 'Quick-code' you want to insert
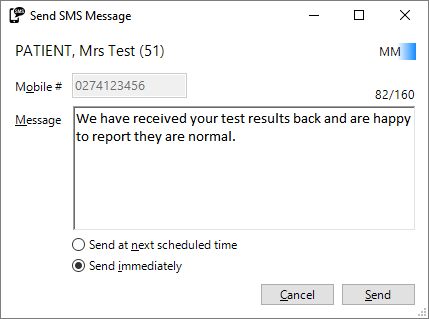
- Choose to send immediately or add it to the queue to be sent with the next scheduled event.
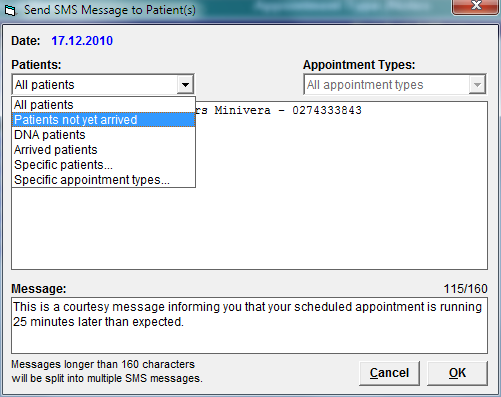
Appointment or Wait-list SMS messages
From here you are able to send ad-hoc appointments to either individual patient or all patients in the session.
Individual patient
- Highlight the patient
- Select SMS from the Toolbar
- Enter the text of the message that you want to send
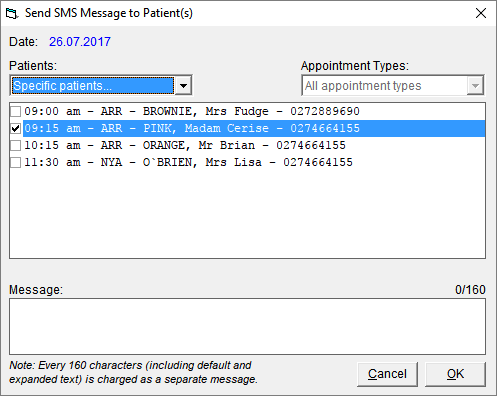
Patients in the Session
- In the Appointment book click on the session header
- Select SMS from the Toolbar
- Choose the patient(s) you want to send an SMS message to:
- All Patients in the list
- Patients not yet marked as Arrived
- Patients that are marked as Did Not Attend (DNA)
- Patients that have Arrived
- Specific patients... (choose them fro the list)
- Patients in the session that have specific Type of appointments
4. Enter the text of the message that you want to send.
Queuing a SMS message
Making Appointments
- Make the appointment as you would normally do.
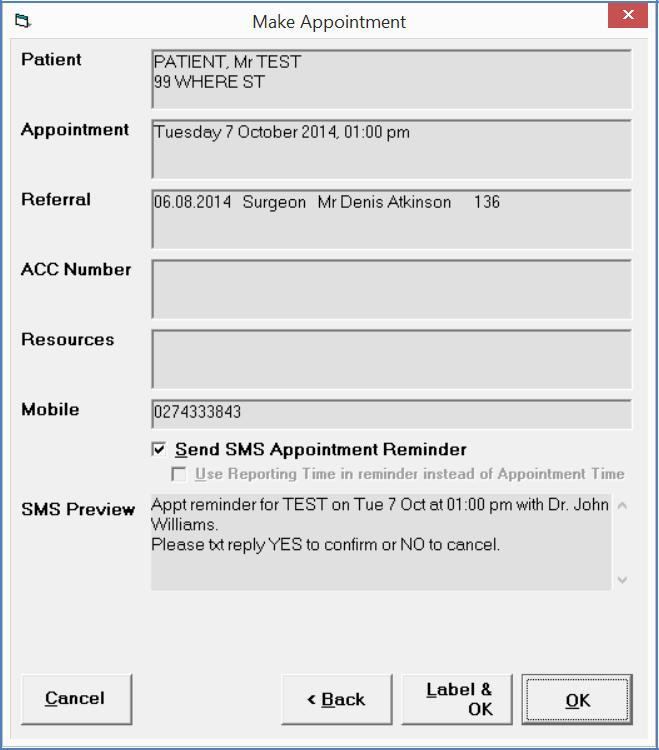
- Make the appointment as you would normally do.
SMS Message Status
Once the SMS message has been queued to be sent an entry will be created in the 'Mail Out' tab of the patient's file showing the status of the SMS message.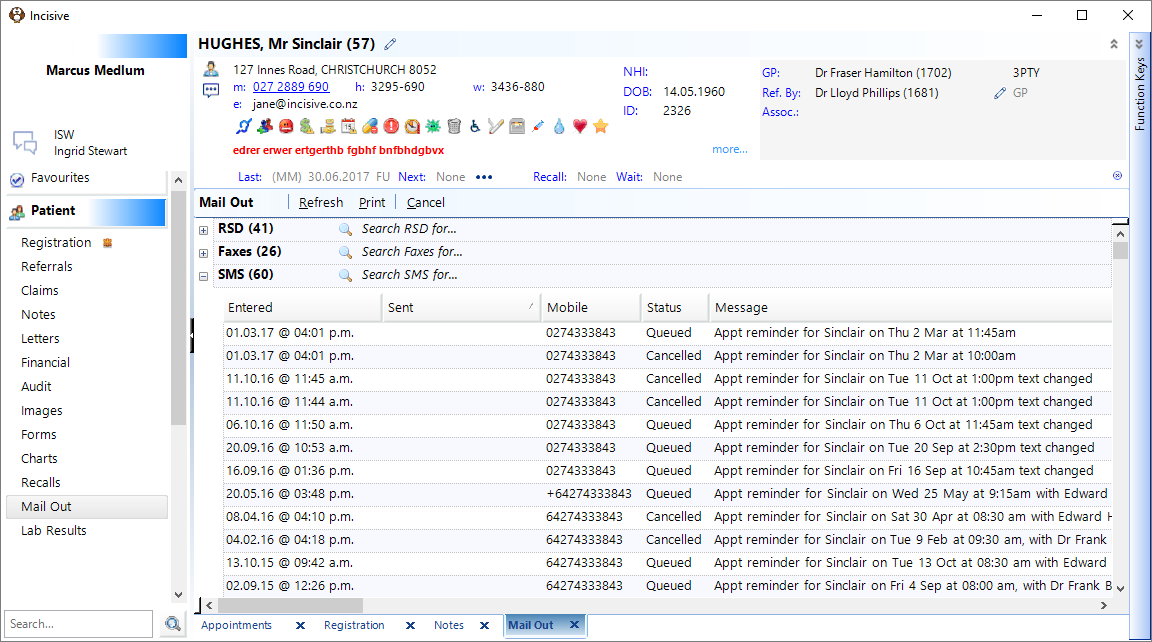
Cancelling a Message
From the Mail Out tab in Patient Mode, highlight the SMS Message and select Cancel, followed by Yes.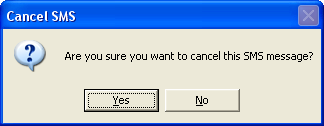
You can only cancel a SMS Message if the Status is queued.
Once the SMS message has been cancelled, the status will display as Cancelled.
Scheduling the 'SMS Sender.exe'
Sending SMS messages
This function performs the same as before where a scheduled task is established to send the outgoing SMS messages once a day.
"SMSSender.exe /auto"
Receiving SMS messages
A second scheduled task needs to be set up for the SMS Sender application to poll more frequently for incoming messages.
"SMSSender.exe /replies"
This task should probably be run every 10 minutes.
Alternatively you can manually run the process by clicking on the 'Check for SMS Replies' button found on the 'Receiving' tab. This polls the SMS Server and checks for replies.
If the above automated /replies option is used, the program will automatically update the Status of the patient's appointment. Otherwise it can be run manually by clicking on the 'Process Replies' button on the Receiving tab.
SMS messages sent and replies received will appear in the patient's 'Mail-Out' tab
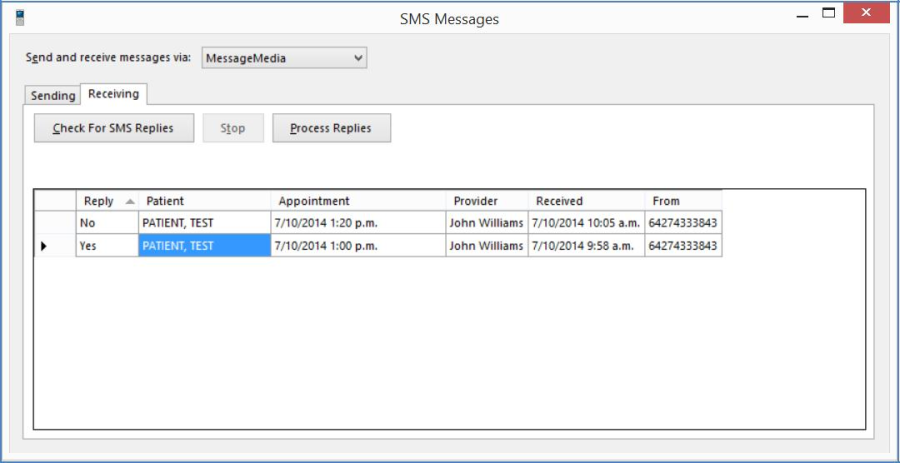
Manually running 'SMS Sender.exe'
In addition to scheduling the sending of messages, 'SMSSender.exe' can also be run manually at any time. The program will normally be located in the \SPMWIN folder of the computers that have had the SMS installer setup.
Send Queued Messages
This will send all Queued Messages for the date selected in the 'Show SMS Messages to be sent on' date.
Stop
If you want to stop the sending of messages (having selected Send) select the Stop icon. This will appear greyed out, unless messages are currently being sent.
Delete
If you want to delete individual queued messages, highlight the message and select Delete.
Show SMS Messages to be sent on:
Select a date to view messages that are queued or were queued to be sent on a certain date.
Change of Status in the Appointment Book
Automatic status update
When a SMS reply is received and processed it will automatically update the status in the Appointments screen.
YES (or Y,y) | will display as | C (confirmed) |
NO (or N, n) | will display as | D (declined) |
If a patient includes any other text in their reply the txt will display in the expanded view of the appointment and also in the SMS report.
So long as there is text of YES, Y, NO, or N (upper or lower case), with a space either side of the text, it will trigger the Confirm or Decline status
Condensed view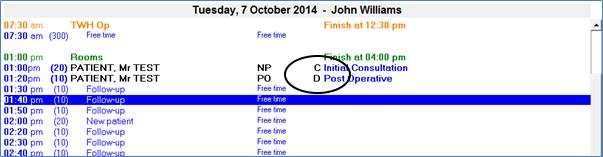
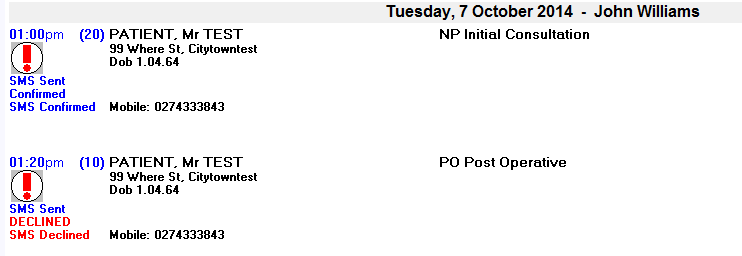
Expanded view 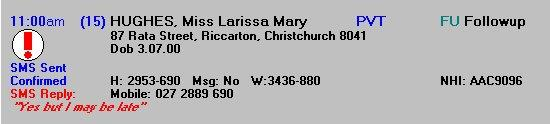
Expanded view with reply message included
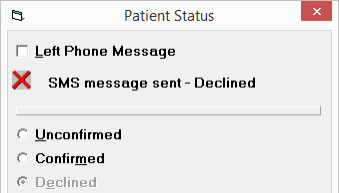
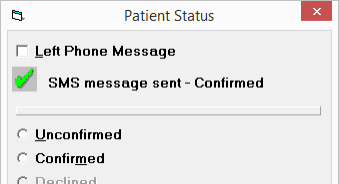
Manual status update You can use the 'Status' button in the toolbar to also confirm an appointment. This option will also display whether the appointment was conformed or declined via SMS.
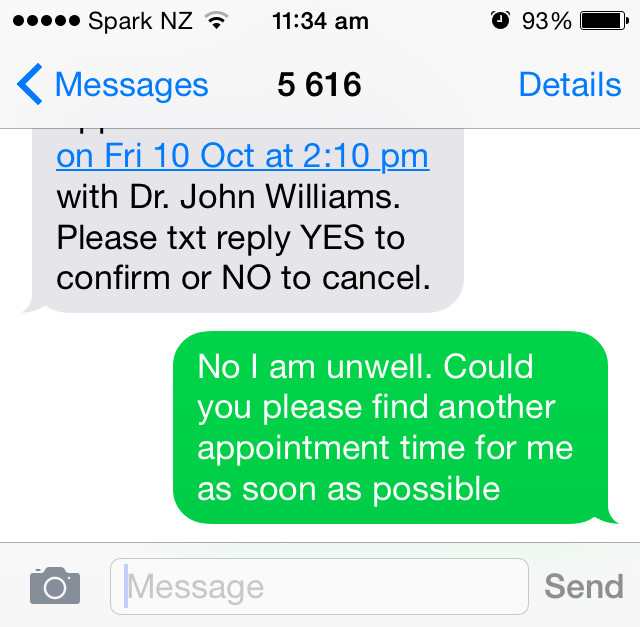
If a patient declines/cancels their appointment, the secretary can then decide whether they want to call the patient, move them to a waiting list or delete them from the list and insert a replacement.
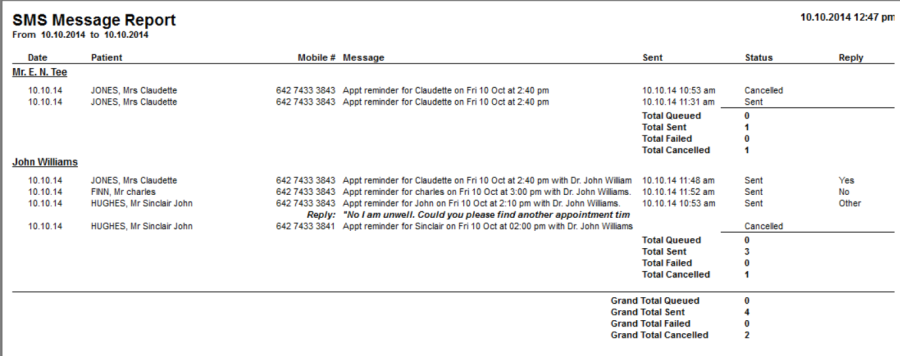
Reports
Reports -> Management -> SMS Messages
This report will provide you with a list of messages sent and received for a period. 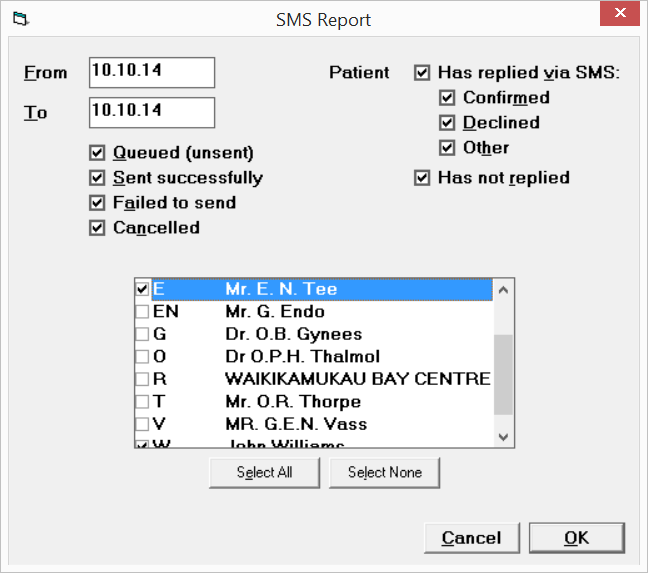
If the reply includes text other than yes, y, no, n the reply will be marked as 'Other' and will include the content of the message on a new line.