Once you have checked and edited a schedule, it is then ready for printing (or if you prefer, print the schedule, but don't advance it and check it off a printed copy).
- Highlight the schedule to print.
- Select 'Process'.
You will be asked to select the schedule date.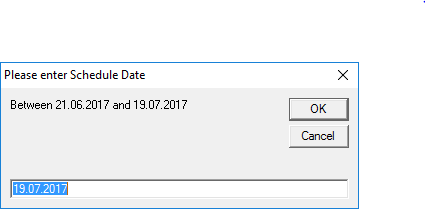
The schedule will display on screen in Print Preview mode.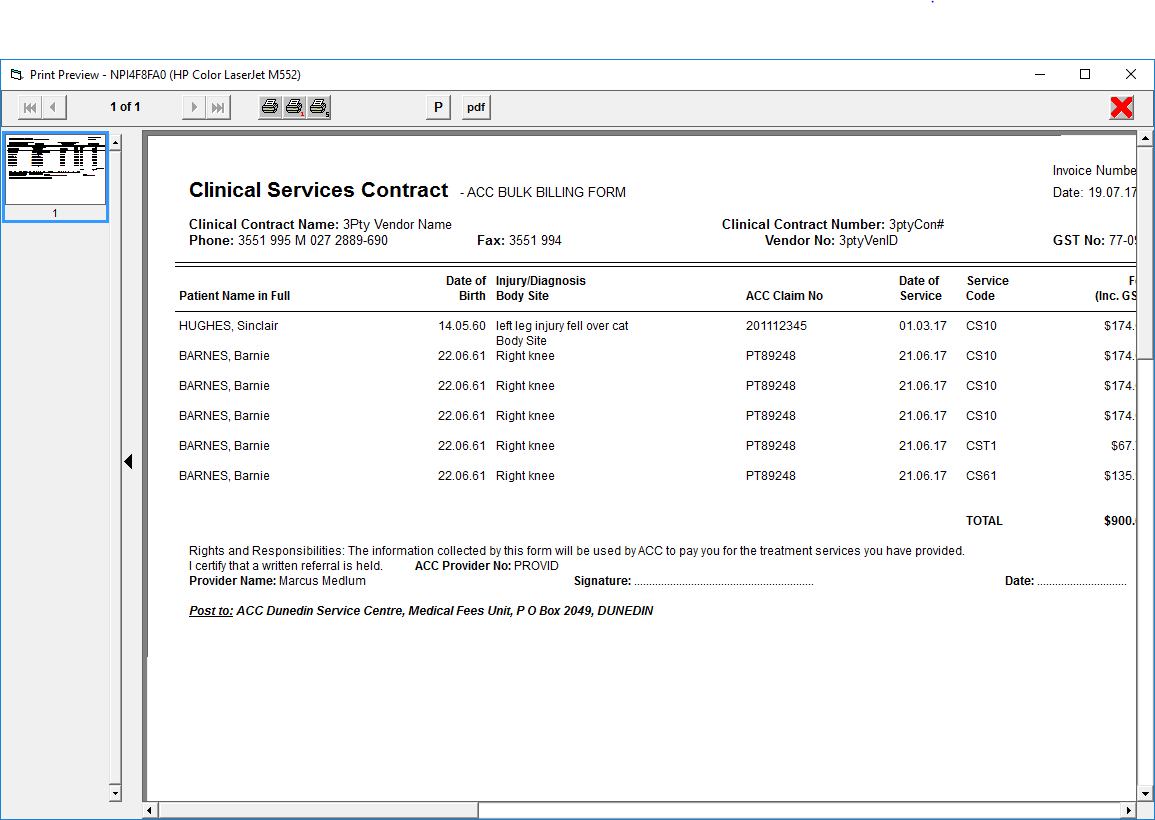
- Select 'Print' (the printer icons).
The schedule will print. - Select 'Close' (the red X in the top right hand corner of the screen).
The following message will appear.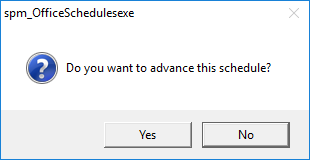
- Select 'Yes' to confirm that the schedule is to be advanced; ie advance to a new schedule and close off the last.
- Select 'No' if you do not want to advance the schedule.
The Schedules Tab now displays the date the schedule was printed (and closed off) and the amount outstanding.
NOTE: Once a schedule has been closed off it cannot be edited. Only once a schedule has been advanced, can it be receipted.