NATIONAL CERVICAL SCREENING PROGRAMME
COLPOSCOPY DATA COLLECTION
Colposcopy Referral
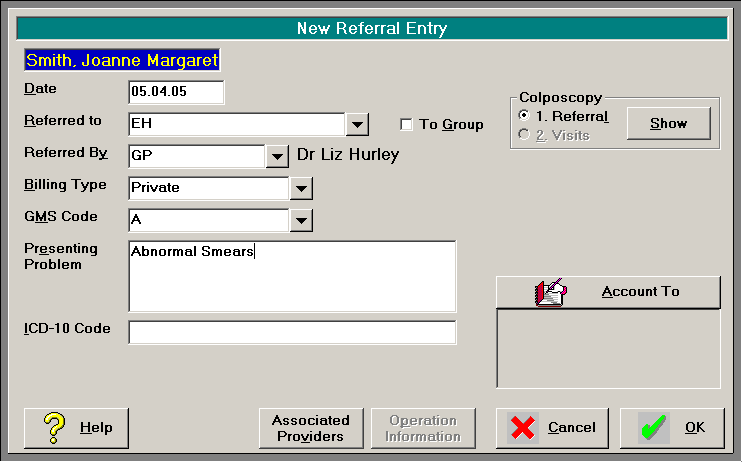
When you create a referral to a User that is a Colposcopist, you will see a section on the Referral Entry Screen for Colposcopy.
Until the Colposcopy Referral information is entered, the Visit option is dimmed.
Selecting Show Referral brings up the following screen to create the Colposcopy Referral. 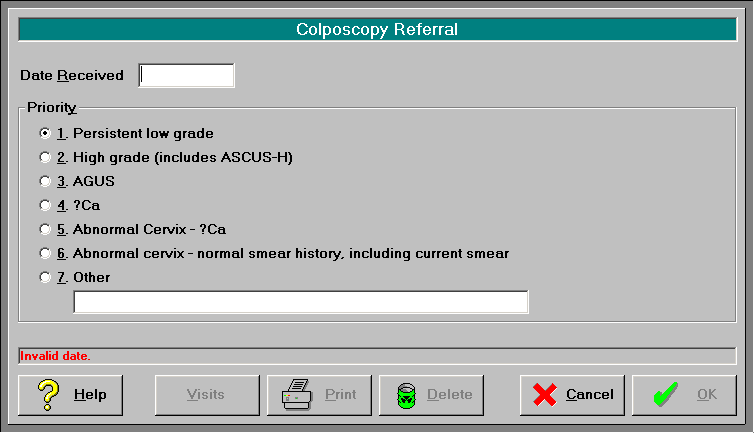
Date Received
The Date Received is to be the date the Colposcopist received the referral from the Smear Taker for this patient.
We would suggest that a good practice may be to date stamp all incoming referrals letters with the date received if you have not already adopted this practice.
Enter the date the Referral was received (pressing Enter will give today's date).
Priority
Select the Priority (the default is Persistent low grade).
To Print the Colposcopy Referral Form, select Print. The Colposcopy Referral / DNA Reporting Form will print with the completed details.
Select OK to save the Colposcopy Referral information.
Visits
Once the patient has been seen, the visit (or did not attend) can be added.
Select Visits and select 'Show'
This brings up a screen showing all the visits, or DNA's linked to the original referral. For a new referral, this screen will be blank. 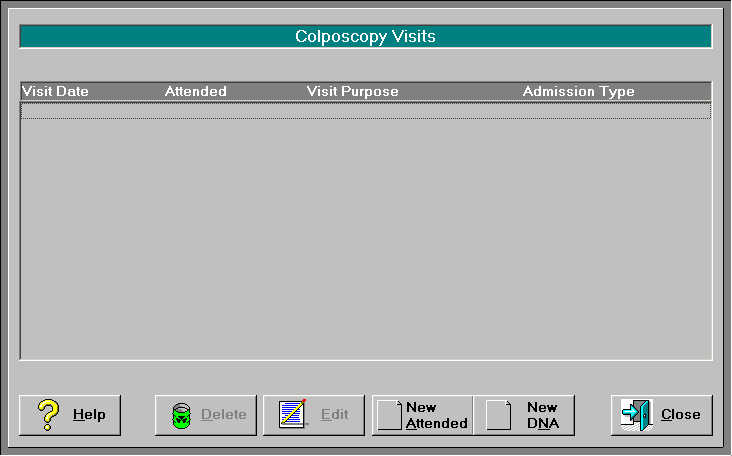
1. Select New Attended to add a Visit.
2.Complete the details and select Print to print the form.
3.Select OK to save the visit details. 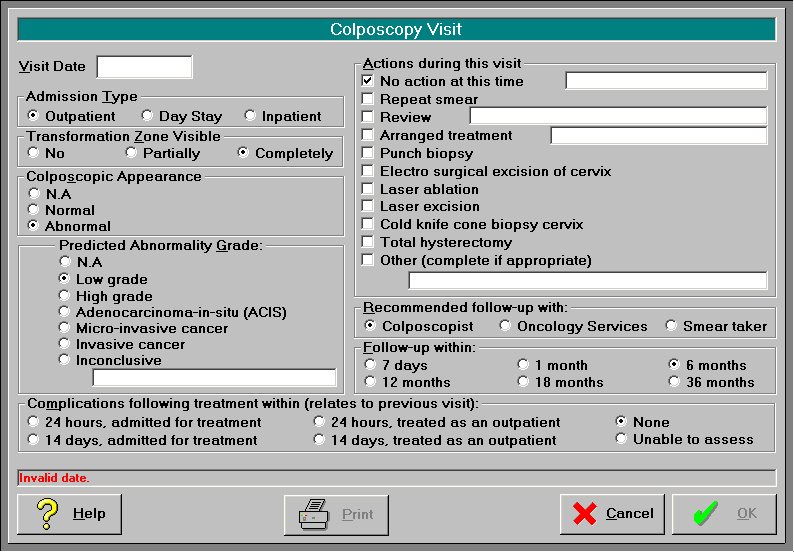
Visit Date
Enter the date the patient visited the Colposcopist.
Admission Type
Select from the following options for Admission type. The default is "Out Patient".
- Outpatient(default)
- Day Stay
- Inpatient
Transformation Zone Visible
Select from the following options:
- No
- Partially
- Completely(default)
Colposcopic Appearance
Select one of the following options:
- N.A.(only applicable if Transformation Zone not visible)
- Normal
- Abnormal
Predicted Abnormality Grade
Select from one of the following options:
- N.A.(can only be selected if the appearance was normal or N.A)
- Low grade
- High grade
- Adenocarcinoma-in-situ (ACIS)
- Micro-invasive cancer
- Inconclusive
Actions during this visit
More than one action may be selected except if 'No action at this time' has been selected.
Select from:
- No Action at this time(default)
- Repeat Smear
- Review(optional text input)
- Arranged treatment(optional text input)
- Punch Biopsy
- Electro surgical excision of cervix
- Laser ablation
- Laser excision
- Cold knife cone biopsy cervix
- Total hysterectomy
- Other(optional text input)
Recommended follow-up with:
Select from one of the following options:
- Colposcopist(default)
- Oncology Services
- Smear taker
Follow-up within:
Select from one of the following options:
- 7 days
- 1 month
- 6 months(default)
- 12 months
- 18 months
- 36 months
Complications following treatment
This relates to the previous visit. Select from the following options:
- 24 hours, admitted for treatment
- 14 days, admitted for treatment
- 24 hours, treated as an outpatient
- 14 days, treated as an outpatient
- None(default)
- Unable to assess.
Did Not Attend
If a patient, having been referred, did not attend the scheduled appointment, select the DNA icon from 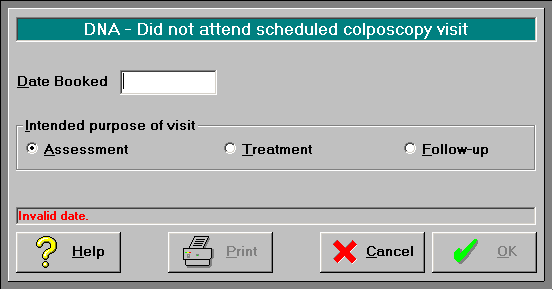
Date Booked
Enter the date the patient was scheduled to visit for their Colposcopy.
Intended Purpose of Visit
Select from the following options the intended purpose of the visit:
- Assessment
- Treatment
- Follow-up
Select Print to print out the DNA Reporting form.
Set Up
User
To activate the Colposcopy Data Collection module, for each User that will be performing Colposcopy procedures:
Go to Setup – User – User Config and select Edit, check the box "Colposcopist". 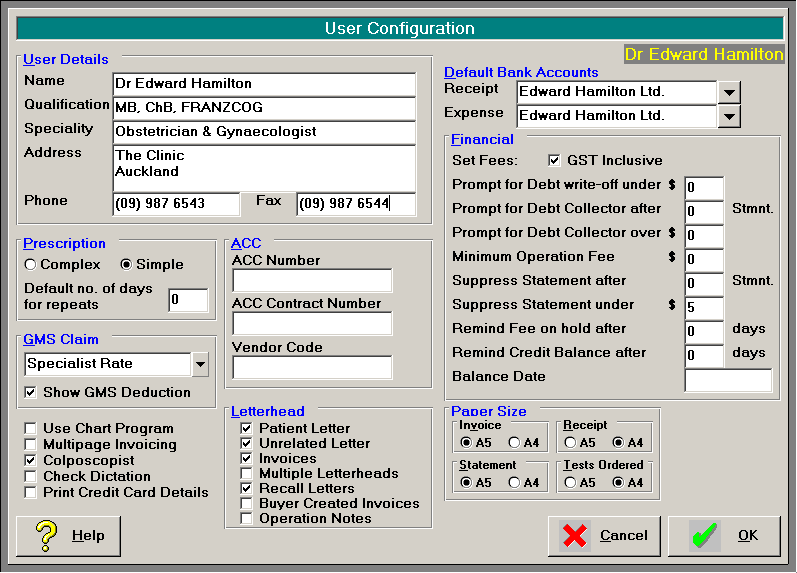
NCSP-R Number
This is the number used to identify the Health Organisation (or Health Centre) on the National Cervical Screening Programme. This number will be supplied to all Colposcopists.
Please enter the number for your facility via Setup – System – Colposcopy NCSP-R number. 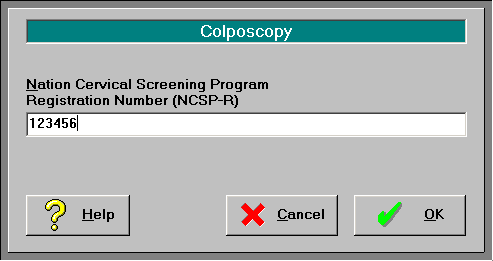
Ethnicity
As the ethnicity is required on the Visit forms, you will need to ensure that your list of ethnicities and Ethnic Group Codes complies with the list put out by the NZHIS. Please see the attached documentation for this.
Once the above set up has been done, you can begin to capture the data.