Only certain staff members are authorised to "process" dictation. Please discuss this with your Practice Manager or Specialist as appropriate.
Dictation typed via Dictation Mode will not show in the patient file (Patient Mode) until it has been processed. This is a requirement imposed by secure electronic messaging services to ensure documents are not sent out of a practice until they have been checked by an authorized person.
Prior to processing, a document may be edited and changed as required and these alterations are not tracked.
Once processed, any alterations done to the Medical Record are recorded with the date identity of the person making the changes.
Dictation entered via Dictation Mode can be processed in a batch rather than letter by letter (as would be required if you were to do your typing in the Patient Mode.
Typing in the Dictation Mode will also allow you to print batches of labels and envelopes.
Electronic recipients
SPM will automatically create electronic copies of your document as per the wishes of the recipient however you will not automatically see these copies.
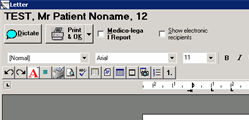
- Once you have created a new document you will be able to see a box at the top left corner of the screen
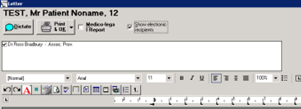
- If you want to see them, click the "Show electronic recipients"
- A small window will open up with the recipients who are saved in our database as wishing to receive electronic copies.
- At this stage you may choose not to send electronic copies by clearing the tick from next to their name.
- If you clear this tick, the recipient will still get a paper copy if they are in our database as wanting paper copies.
NOTE: If you simply delete the recipient's names and addresses from the document without un-ticking their names in the "Electronic Recipients" box at the top of the screen, the recipient will still get an electronic copy. All you have done is remove their name from the document.
Checking the documents
- Select 'Dictation Mode'
- Select' Check'
- A list of patient names with complete typing will display
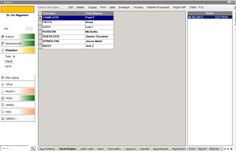
- Optionally, you could select 'Display' and select whether to display dictation for All Operators, or select which operator to display typing for. The list of operator names present will be dependent on which operators have unprocessed typing (this allows you to deal with typing from one typist at a time)
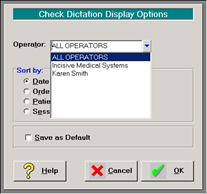
- Note that by using the Display option and processing 'Displayed dictation' it is possible to process dictation only typed by one operator, i.e. Operation Reports
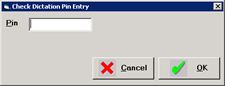
- If the dictation has not been marked as 'Checked' as it was typed, you will need to check each item (letter / operation note) before it can be processed. Select an item and either press F11 to start checking or select 'Check – F11'
- Enter the Dictation Pin number and press Enter or select OK
- Correct / proof read each letter or operation report. When you are satisfied that it is ready for processing, press F11 or select the Check Dictation icon (black tick) at the top of the screen
- If you have made some changes to the letter or report but are not satisfied that it is ready for processing, just save the changes you have made by selecting 'OK'.
- When you have finished checking, or wish to process (only) those entries that you have checked, select 'Process'
Printing file copies
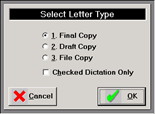
- If you have had your typing done by an off-site typist and require a file copy of the letters, before you 'process' the letters, select the 'Print' option from the Check Dictation tool bar
- Select 'File Copy' and optionally 'Checked Dictation Only'
- A single copy will print from the tray designated for 'File Copy' in the set up for your printer
- Once you have printed the 'File Copy' (if required), you are now ready to Process the dictation
Processing checked documents
- Select Process. A window will pop up asking you if you really want to process all these documents. This is because "processing" documents files these documents to the patient files as part of their legal records. All changes to the document after they are processed are tracked by the software
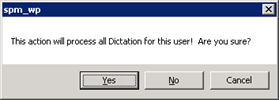
- Confirm that you want to process the dictation
- Depending on what options you require, configure the 'Check Dictation Print Options' screen as required
- If you require Operation Notes to print out, check this option, together with the (normal) number of copies, i.e. 2 (one for referring doctor and one for the hospital).
- If you only want to process the dictation that is currently display on the screen (i.e. typed by one operator), select the 'Displayed only' option. You can save as Default these choices
- Select 'OK'
- Items of dictation that have been checked will print out and an electronic copy will be created for all Contacts where HealthLink has been selected as the preferred method
At the time the letter was created, the options selected for the 'Letter To' and 'Copy To' recipients were used to calculate how many actual letters to print for each entry. Therefore the correct number of physical letters should print out, but this should always be checked when putting the letters into envelopes - Any 'unchecked' letters will remain in the list to be check at a later time
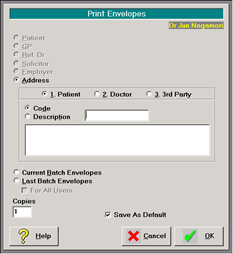
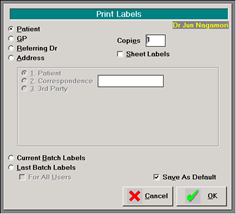
Envelopes and labels
Once the letters have been processed, you can either print off a batch of envelopes or labels depending on your preference.
- Select either Envelope followed by 'Current Batch Envelopes' or 'Labels > Current Batch Labels'
- Depending on the configuration carried out in Setup > Provider > Dictation > Batch Label / Envelope, you will either get a label / envelope for every letter in the batch or just the copy to letters if you use Window envelopes for the Addressee