Preparation for Initialisation
- Set up Expense and Income codes.
These codes can be entered at your convenience; they are not dependent on the cash book being initialised. - Once the codes have been entered, send a copy to your accountant and to Incisive.
If you do this before using any of the codes it is a very simple matter to edit them and make changes if any have been incorrectly entered. - To initialise the cashbook we need a date for the initialisation and the bank statement balance as at that date. Ideally send through a copy of the bank statement to us.
- Manually work out what cheques and deposits have not been presented as at the date of initialisation.
NOTE: All un-presented items must be entered as Expenses or Receipts prior to initialising the opening balance.
Please phone us prior to initialising the cashbook. We prefer to do this step for you as it can be very difficult to re-initialise the cashbook if a mistake is made in the initialisation process. We ask you to be careful in establishing the opening balance.
Autopayments
Automatic Payments are regular amounts that are either paid into or paid out of your bank account. For example a hospital salary that is paid into your business bank account each month (for the same amount) could be set up as an Income automatic payment. Payments out of your business account for rent could be set up as an Expense automatic payment.
Set up a new automatic payment
Setup - Financial - Cashbook - Autopayments
- Select 'New'.
- Complete the details on the screen as applicable for the automatic payment that you are adding.
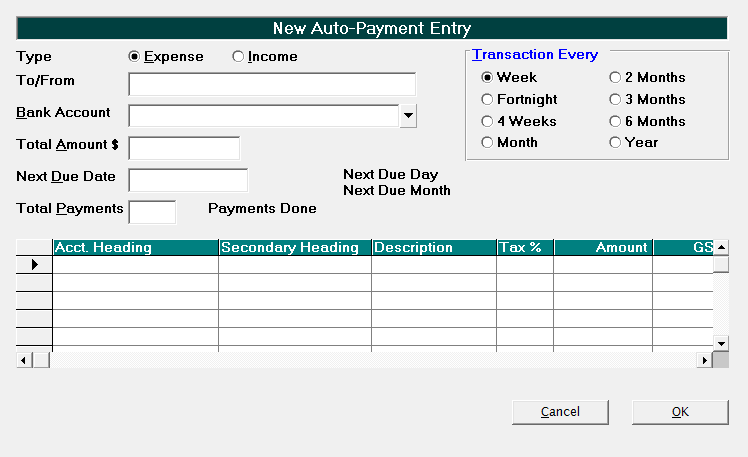
Select 'OK' to save the new automatic payment.
Type
Choose whether the Autopayment is an expense (money going out of your account) or income (money coming into your account).
To/From
Enter the details of who is being paid or who the payment is from.
Bank Account
Choose the bank account which the payment will be either paid from or paid into.
Total Amount $
Enter the total amount of the automatic payment.
Next Due Date
Enter the date that the payment is next due. Note, this can be in the past.
Total Payments
You can nominate the number of payments to be made or leave this field blank if the payment is to continue indefinitely, i.e. you do not have an end date.
Transaction Every
Select the frequency that the payment is to be made.
Account Heading
In the grid section, use F8 to select an account heading (or multiple account headings) together with the amount that is to be allocated to each
Commit automatic payments
Automatic payments need to be committed before they will appear in the Cashbook to be reconciled, or in any reports.
Setup - Financial - Cashbook - Autopayments
- Select 'Commit'
- Enter the date you want the autopayments are to be committed to. The default is today's date.
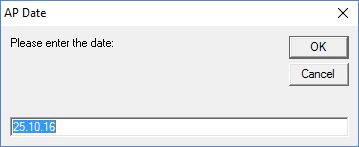
- Select 'OK'.
- You will be prompted to confirm that you want to commit all automatic payments that are due on this date of before.
This step is irreversible. Only select 'Yes' if you are sure.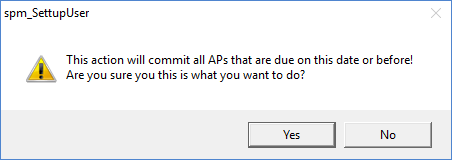
Alternatively automatic payments can be committed via Office - Cashbook.
Ledger Accounts
Expense
If you wish to enter your expenses into SPM you will need to set up Expense Codes to categorise your expenses. It is recommended that you give some thought to this, preferably in consultation with your Accountant. At the very least you should get a list of the existing breakdown of Expenses and Income that your Accountant uses.
Add New Expense Categories
- Select Financial > Cashbook > Ledger Accounts > Expense Codes > New.
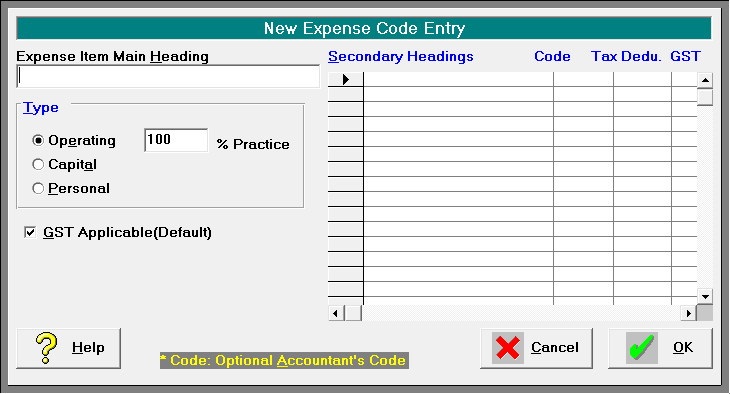
Expense Item Main Heading | Enter the Expense Item Main Heading e.g. Vehicle Expenses. |
Type | Select the type of expense. Choose between: Operating Capital Personal |
% Practice | If the expense is an operating expense you must enter the percentage that is applicable for the business. eg you may be able to claim 75% of all your vehicle expenses so enter these as an operating expense and put 75 in the "% Practice" field. |
GST Applicable | By default GST is deemed to be applicable for Operating and Capital Expenses. If it is not, you must remove the tick from the GST Applicable check box. |
Secondary Headings | Each expense can have multiple secondary headings and you must have at least one. For instance you may wish to divide vehicle expenses into petrol, maintenance and registration fees. Enter each of these secondary headings on a different line of the "Secondary Headings" box. Type in the secondary heading and press Enter. |
Code | Enter the optional Accountant's code. |
Tax Deductible | The Tax Deductible and GST columns will automatically be filled in with the defaults from the Main Heading level. Alter these only if the particular Secondary Heading differs from the Main Heading defaults. |
GST | If the sub-expense does not incur GST, enter "No" into the GST column. E.g. you may have a category called "Subscriptions" of which NZ subscriptions incur GST but overseas subscriptions do not. |
Edit an Expense Code
- Highlight the entry you want to edit.
- Select 'Edit'.
- Add new Sub Headings or alter exiting entries as required.
- Select 'OK'.
Delete an Expense Code
You can delete Expense Headings or Sub Heading only if they have not already been used for entering expenses.
- Highlight the entry you want to delete.
- Select 'Delete'.
Print a List of Expense Headings and Sub Headings
(Can be printed here or in Reports Mode).
- Select 'Print'.
Income
If you wish to enter income other than patient, schedule and third party receipts into SPM you will need to set up income accounts to categorise this, e.g. hospital salary, interest and dividend payments.
Add New Income Codes
- Select Financial > Cashbook > Ledger Accounts > Income Codes > New.
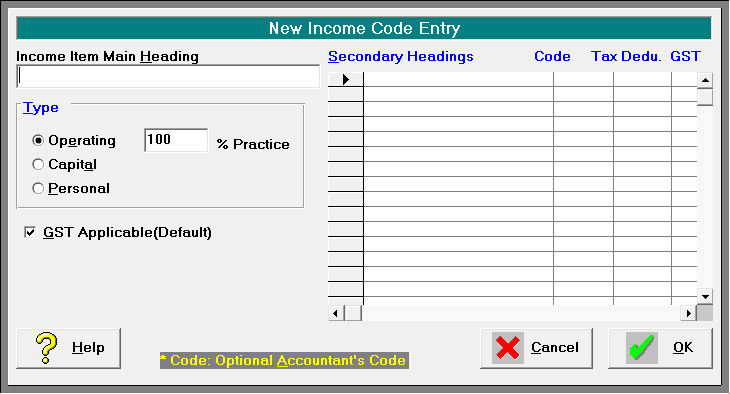
- Enter the Income Item Main Heading and press 'Enter'.
- Select the type of income i.e. 'Operating', 'Capital' or 'Personal'.
- By default GST is deemed to be applicable for Operating and Capital Income. If it is not, you must remove the tick from the 'GST Applicable' check box.
- Each Income Item Main Heading can have multiple secondary headings and it must have at least one. For instance you may wish to divide rental income into the different properties for which you receive rental payments.
Enter each of these secondary headings on a different line of the "Secondary Headings" box. - If you wish to record the code that your accountant uses you may do this here.
- The Tax Deductibility and GST columns will automatically be filled in with the defaults from the Main Heading level. Alter these only if the particular Secondary Heading differs from the Main Heading defaults. If the Secondary Heading does not incur GST, "No" should be entered into the GST column.
- Select 'OK'.
Edit an Income Code
- Highlight the entry you want to edit.
- Select 'Edit'.
- Add new Sub Headings or alter exiting entries as required.
- Select 'OK'.
Delete an Income Code
You can only delete Income Codes or Sub Heading only if they have not already been used for entering income.
- Highlight the entry you want to delete.
- Select 'Delete'.
Print a List of Income Codes
(Can be printed here or in Reports Mode).
- Select 'Print'.
Initialise Cashbook
The Initialise Cashbook option allows you to initialise the opening cashbook balance for each bank account that you intend running a reconciled cashbook.
The Cashbook can be initialised retrospectively from any date. You must manually work out what Receipts (Deposit Supplements, EFTPOS Supplements and Direct Credits) and Expenses (Cheques and Automatic Payments) have not been presented as at the date of initialisation. It is important that this is done correctly. If necessary, have your Accountant work this out for you.
NOTE: All unpresented items must all be entered as Expenses or Receipts prior to initialising the opening balance.
Initialise the Opening Cashbook Balance
- Highlight the bank account.
- Select 'Initialise Cashbook'.
The following screen displays.
- Type in the Start Date and press 'Enter'. This would normally be the first day of the month, ideally the financial year.
A list of Cheques, Direct Debits, Deposit and EFTPOS Supplements and Direct Credits dated prior to the Start Date should appear on the screen. - Type the Bank Statement Page Number that you will be starting from and press 'Enter'.
- Type the Statement Balance as at the Start Date and press 'Enter'. If your Start Date is the first of the month, the Statement Balance is the last balance for the end of the previous month. If the opening balance is in overdraft, precede the number with a minus sign
 . The dollar sign ($) is not necessary.
 - The screen displays the list in reverse chronological order as the most recent entries are the ones most likely to be unpresented. Tag the items in the list on screen that have not been presented as at the Start Date.
Use Function Key F6 or the space bar to tag the items.
NOTE: These keys toggle on and off. As you tag an item, the cursor automatically moves down to the next entry.
The calculated Cashbook Balance displays in the bottom right hand corner. - When all items have been tagged, and the balance is correct select 'OK'.
You are now ready to reconcile your bank statements.
On this page: