A Group Receipt is used where a single payment has been made for multiple invoices and multiple patients, i.e. a cheque that covers both a husband and wife, or a direct credit from an Insurance Company or Health Fund for a number of different patients.
It ensures that a single entry is made to the banking (i.e. the total sum paid) rather than individual amounts for each patient. It also ensures that the correct amount is receipted and allocated, as the total must equate to the sum of the amounts allocated to the patients.
This option is not used where you receive a single payment for a schedule (batch) invoice which is a single invoice for services to multiple patients. Use Office > Schedules to receipt payment for a schedule invoice.
Group Receipts can only be entered via Office > Receipts.
There are two parts to completing the Group Receipt.
- Recording the total Payment received
- Allocating portions of the payment to patients.
To enter the Payment received
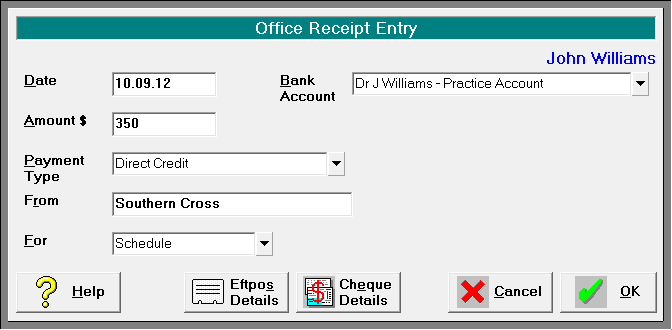
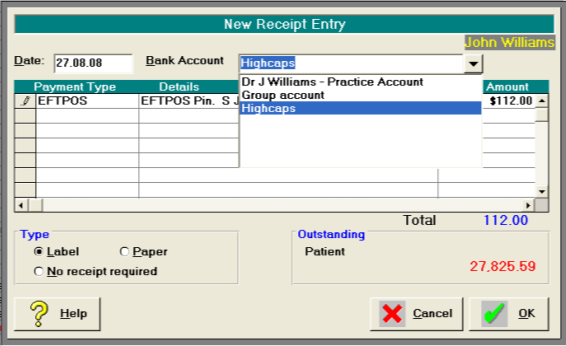
Complete the receipt details for the total amount paid.
This is the amount that has been deposited in your bank account, or will be included in the banking deposit supplement.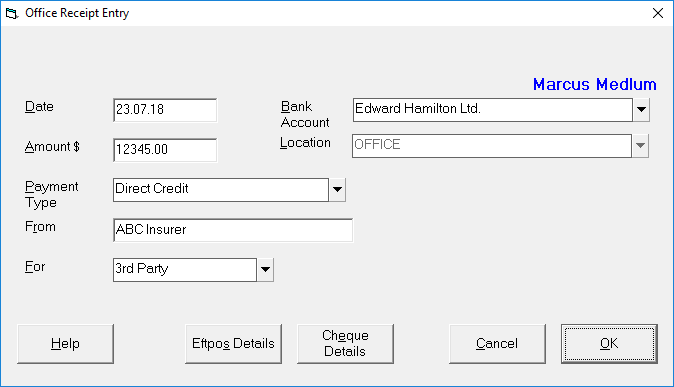
- Enter the date of the payment. If the payment is a cheque, press enter for today's date. If the payment is a direct credit, ensure that the date is the date the funds were deposited to the bank account, or as per the Payment Remittance Advice.
- Select the bank account the payment has or will be deposited into.
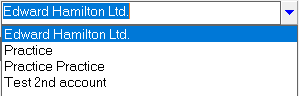
The default bank account will be selected. Only change this if the funds have, or will be, deposited into another bank account. - Type the total amount received.
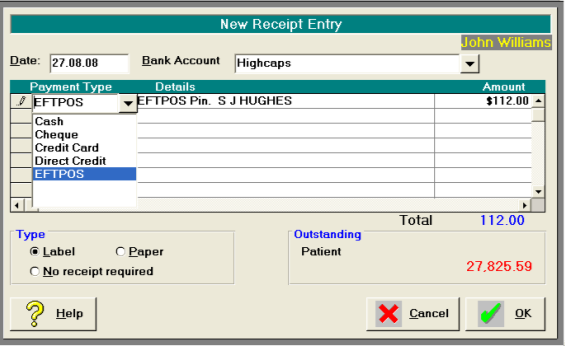
- Select the Payment Type
- Cash,
- Cheque,
- Credit Card,
- Direct Credit or,
- EFTPOS.
Depending on the payment type selected, further screens may appear for completion.
Cash The payment amount will appear on the banking deposit supplement.
Cheque 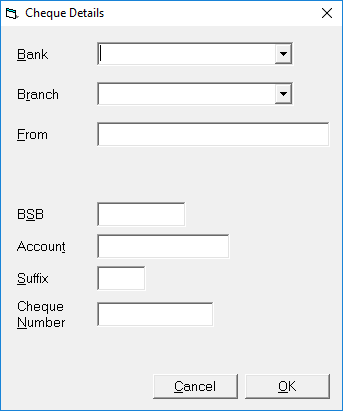
The payment amount will appear on the banking deposit supplement.
BankSelect the bank from the list or type in the name of a new bank. If the bank is new a prompt will appear asking if you want to save the bank to the list for future selection.
BranchSelect the branch or type the name of the new branch.
FromType in the name that is on the cheque. Some like to include the cheque number as well.
Credit Card This is only used for the non-electronic credit cards where a manual slip is completed.
Direct CardUse this option when the payment has been directly deposited into the bank account. You do not have any funds to bank.
EFTPOSThis option is used for electronic debit or credit transactions. 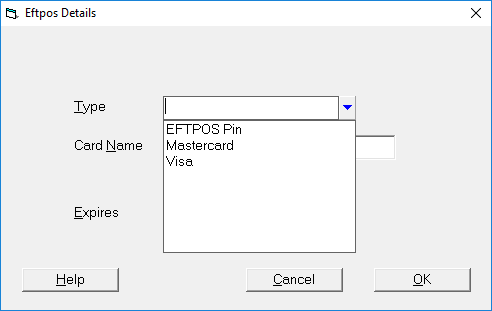
The Types you can select from are:
- EFTPOS Pin
- Mastercard
- Visa
- Type in who the payment was from, i.e. Medibank Private, J & M Jones
- Select, from the options, the type of invoice that was issued.
- 3rd Party,
- Other,
- Patient or,
- Schedule.
This relates to who the invoice was to, i.e. Patient Invoice or 3rd Party Invoice and not necessarily who is paying the invoices.
Allocation to patients
Once the payment details have been entered you then need to allocate all of the funds to patients.
The amount 'banked' displays in the top right corner.
You cannot exit from this form until the amount you have receipted to the patients equals the amount banked.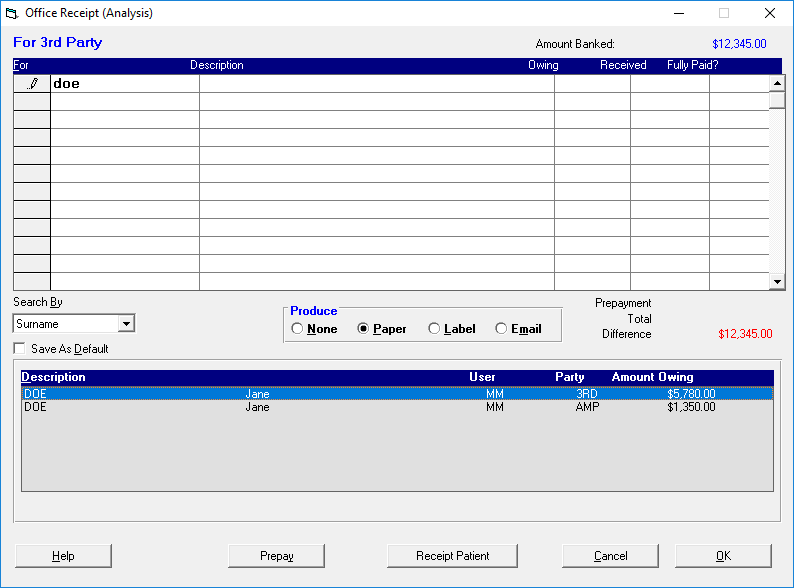
On the Remittance Advice statement you received with the payment, you will be able to see which patient invoices have been paid – either partially or fully.
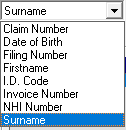
Search for the patient
- Check to see which 'Search By' method is selected, and change (and Save as Default) as required.
- In first row in the 'For' column, type in the text that you want to search for. Press Enter to start the search.
You can enter partial search text e.g typing in 'SMI' will search for patients with names of Smiler, Smiley, Smith, Smithson etc.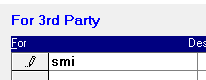
- The search will return all patients that match the text you searched for, and who have an amount outstanding.
Note that this only searches across patients with outstanding invoices for the Party selected, i.e. Patient or 3rd Party. If you have selected 3rd Party and the invoice was to Patient, the search will not be successful. - Double-click on the patient, or highlight the patient and press the Enter key. This will insert the patient and invoice details into the receipting grid.

- Press the Enter key to move to the next row – do not use the mouse. Continue searching for the patients by repeating from step 2.
Invoice Type
Occasionally an invoice that was given to a patient gets paid by another party (e.g. insurer), and vice-versa. If this is the case then it is likely that your search for the patient will not be successful unless you switch to search the other Invoice Type.
- At the bottom of the form click on the 'Receipt 3rd' or 'Receipt Patient' button to switch the search criteria.

 The search will be initiated immediately.
Invoice Search
The payor may not use the patient's name to identify the payment amounts, instead they may just provide an invoice number. Use the Search by 'Invoice Number' option to search the invoice number.
- Click on the 'Invoice Search' button and enter the invoice number.

- The patient that matches the invoice will appear in the selection list.

Prepayments
Part of a payment may include a 'prepayment' for an operation, which will not of been invoiced yet, therefore the patient or invoice search will not be successful. You can enter a prepayment and include it as part of your receipt.
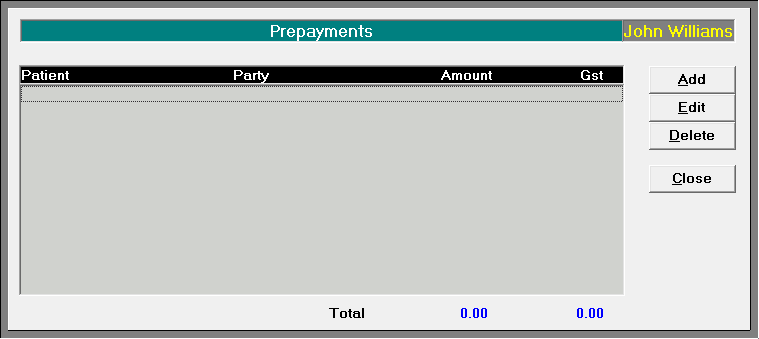
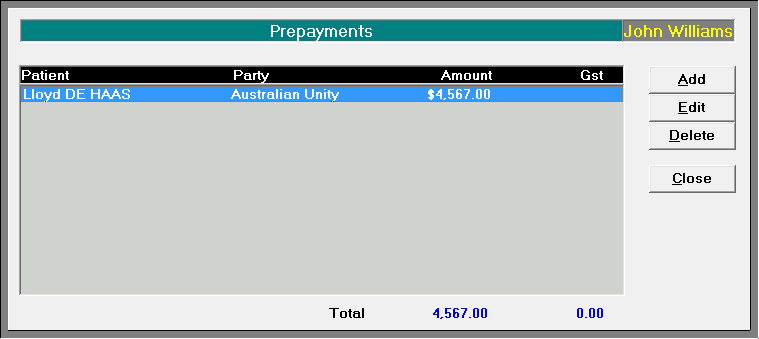
- Click on the 'Prepay' button

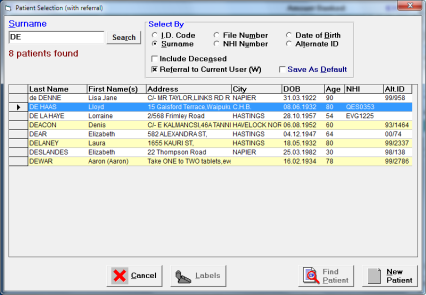
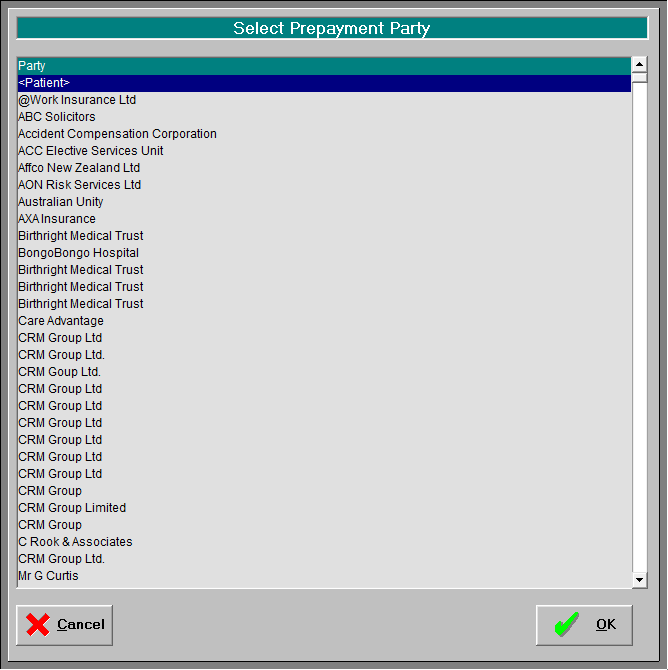
- Click on the 'Add' button to search for the patient you are accepting the prepayment for.
- Enter in the prepayment amount
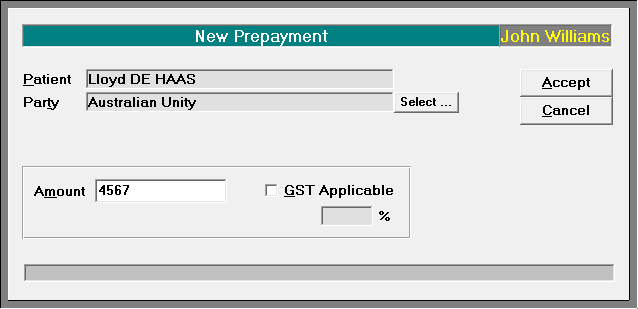
- Select the 'Party that is paying the prepayment. If it is the patient chose the first item on the list.
- The prepayment will appear in the list. Continue adding further prepayments or click 'Close to exit.
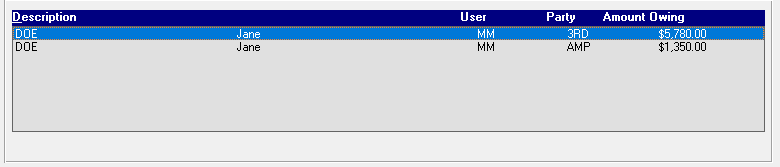
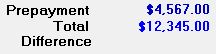
The total amount of prepayments will be included with the calculation of the 'Difference' still owing.
Partial Payment
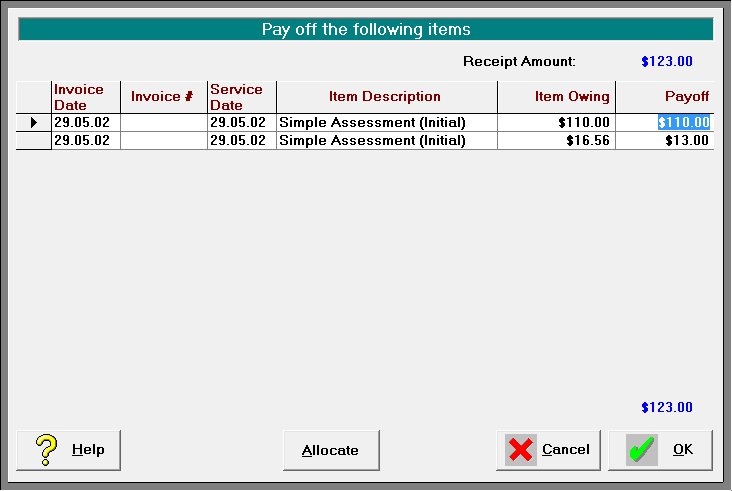
If the amount being paid for a patient is less than what is owed, you will be able to nominate which, of the patient's invoices, you want to 'pay-off'.
- In the 'Received' column, type in (overwrite) the amount that is being paid.
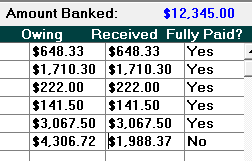
- Then press the Enter key (this action is important). If the patient has more than one invoice outstanding a form will appear listing the invoices and it will 'pay-off' the oldest invoices first. If this is not correct, change the values for the invoices.
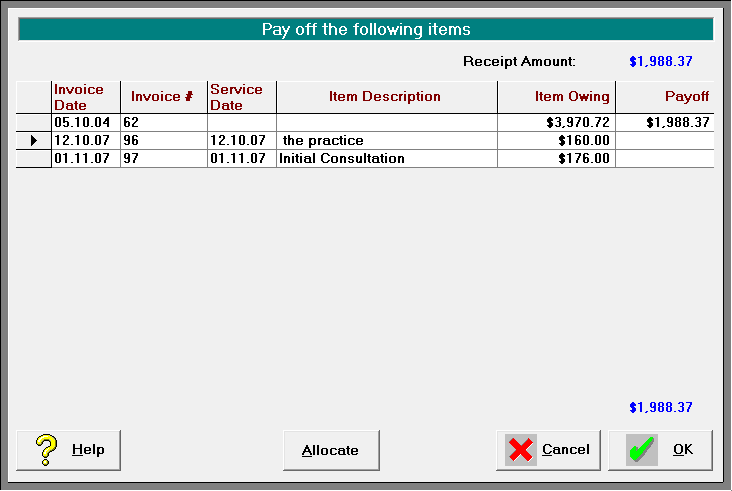
Click OK once the allocation is correct.
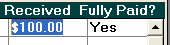
Accept as Full payment
If an invoice has been partially paid you have an option to ignore the remaining balance outstanding and accept it as 'Full' payment.
- In the 'Fully Paid?' column, ensure the selection is 'Yes'
- Continue to select and pay off individual patients until there is no Difference.
The 'Amount Banked' at the top of the screen must equal the 'Total' at the bottom of the screen. 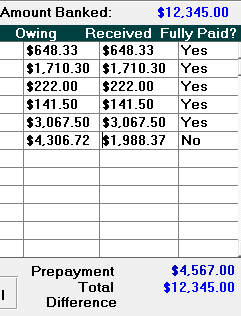
Producing a Receipt
- Choose the type of receipt document to produce.

The options are:
- None
- Paper
- Label
- Click OK to save and exit.
Receipts
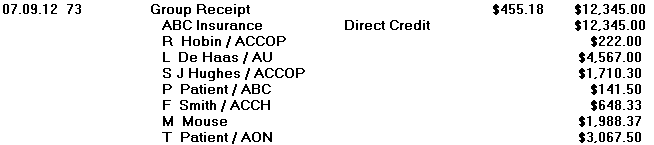
Please note that if you select a paper or label receipt in Office, a receipt will print for the total amount receipted. If a paper receipt is chosen, it will list each patient together with the amount allocated to them.
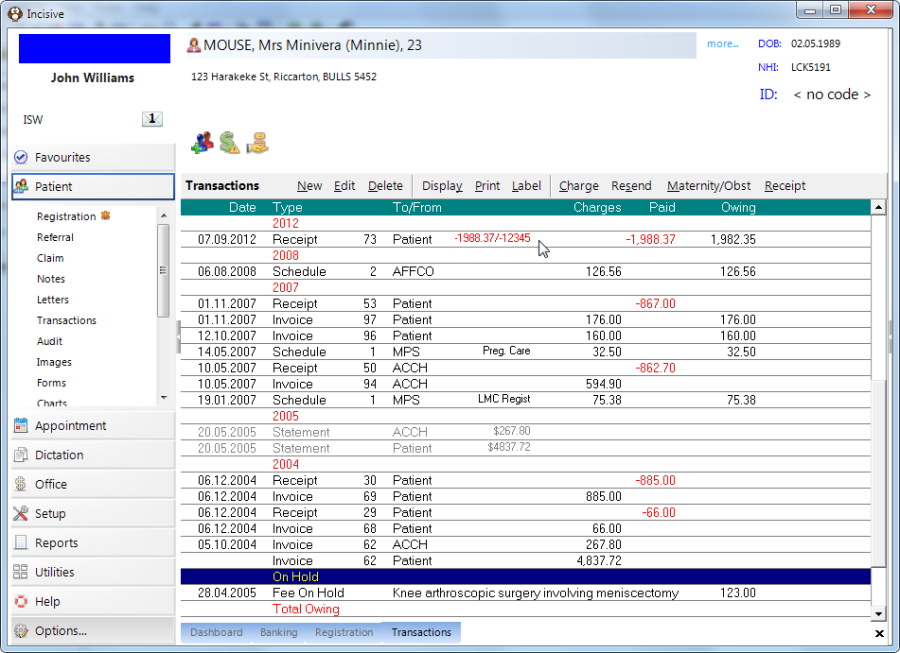
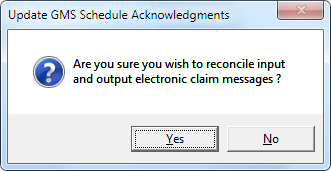
If you require an individual receipt to send to the patient, go to Patient Mode, $Transactions. Highlight the receipt and select Print – Highlighted entry. If you then choose 'Paper' you will get the following message.
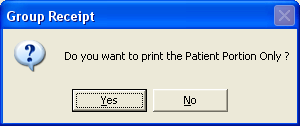
Select 'Yes' to get an individual receipt for the selected patient.
*Office All Receipts*
Once the payment has been receipted it will appear in Office All Receipts.

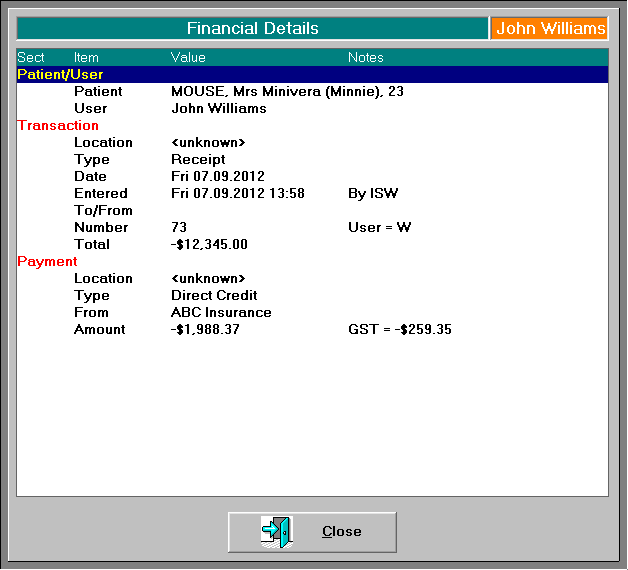
To see the detail of the receipt you can either highlight the receipt entry and press the spacebar,
Or select Print from the Toolbar and choose from the options. 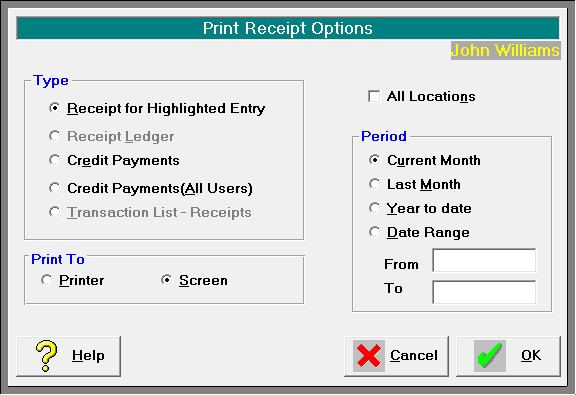
Credit Payments
Receipts are paid into a shared bank account (Group Practice account) will appear as a 'Credit Payment' in the financial records for each of the Users.
The term Credit Payment is used as it is the 'Group' User who issued the receipt – not the individual specialist.
Patient Financials
When the receipt is save in Office – All Receipts it allocates the payments to the individual patients and these appear in the Patient's file.
Schedule Receipts
A Schedule Invoice includes multiple patient services, and is always issued to a 3rd Party. 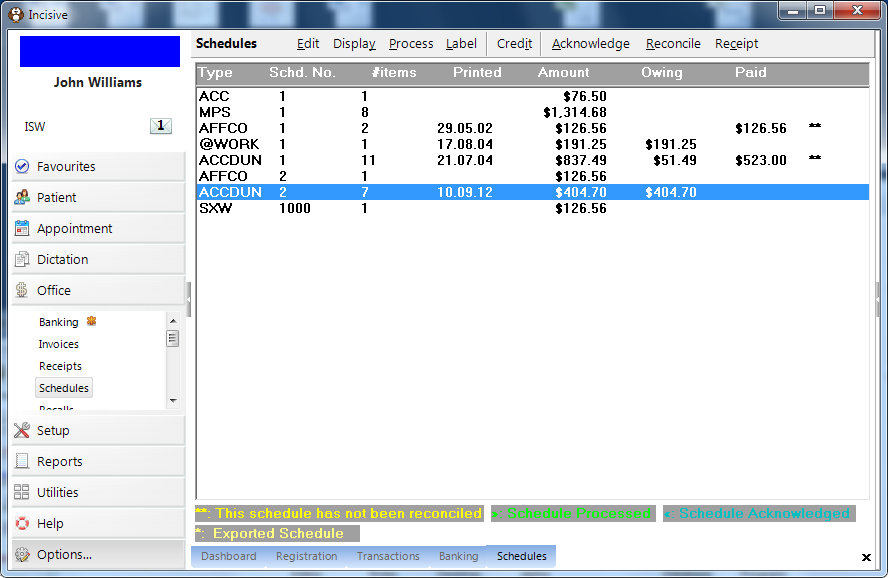
Payment of a schedule invoice can be complex as the Payor may choose to only partially pay for all the patients included on the invoice, or may make multiple partial payments over a period of time.
Like Group Receipting ({_}Office Receipts)_ it involves two distinct components:
- Recording the total Payment received
- Allocating portions of the payment to patients.
But unlike the Group Receipting function, these two processes do not need to be completed at the same time. This means you can receive the payment and include it in your banking, but delay applying the payments to the individual patients until a later date. This is called 'Reconciling' the invoice.
Multiple payments can be received, over a period of time, and applied against the invoice.
At an advanced level, there is an add-on function to allow the
Receipting payment
- Go to _Office Schedules_ and select 'Receipt' from the Toolbar.
- Complete the payment options.
- Enter the amounts being paid off against each schedule invoice.
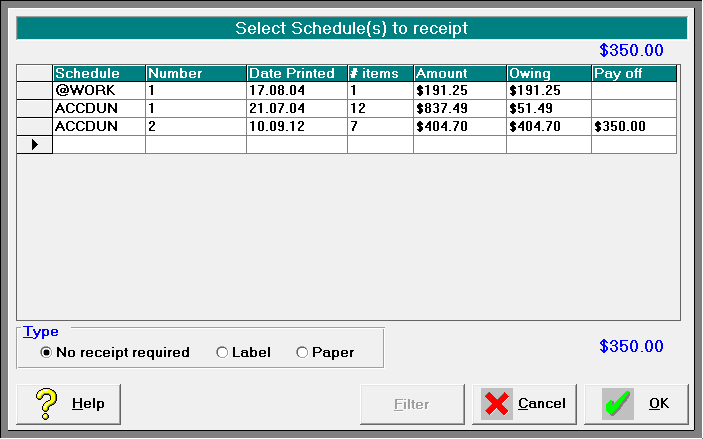
- Choose the Type of receipt to issue.

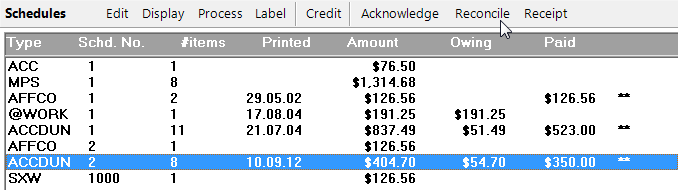
- The invoice will now appear as having been paid.

but the payment has not yet been applied to the patients so will not yet appear as a transaction in their financial file.
Reconciling the invoice
Reconciling an invoice is the process of applying the payments received to the services claimed for each individual patient on the invoice.
This process will then cause the payment to show on the patient's transactions.
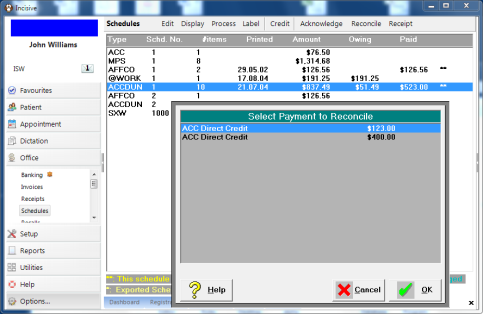
- Highlight the invoice and select 'Reconcile' from the Toolbar.
- If more than one payment has been applied to the invoice, select the payment you are reconciling.
- In the '$Paid' column, enter in the amount being paid for each claim made.
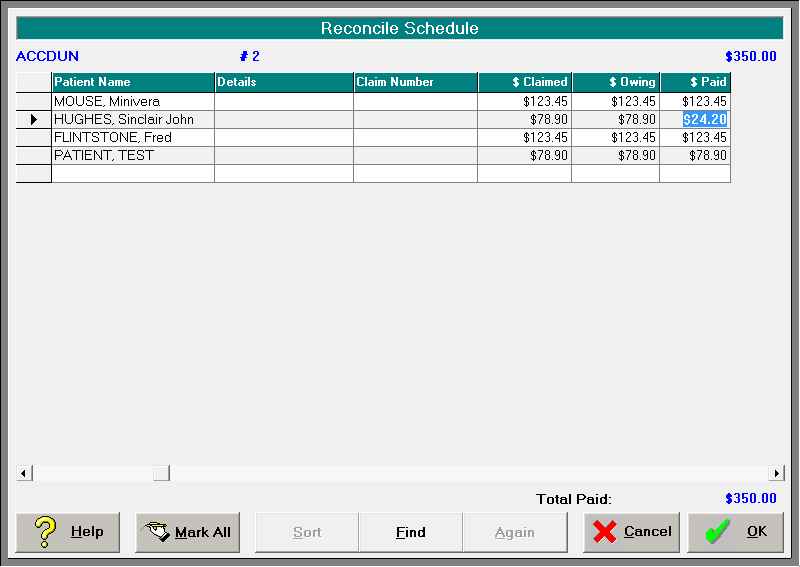
If all of the items have been fully paid, use the 'Mark All' which will mark all of the claim items as fully paid.If partial payment is being made for any of the items, enter in the payment amount. A further form will appear with the items that make up the claim. Allocate the payments to the individual items.
A message will appear warning that the schedule invoice cannot now be altered or deleted. 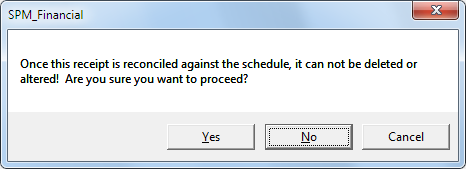
- If the invoice has not been fully paid it will remain listed until you receive further payments or you choose to credit off the remaining balance owing.

Issuing a Credit
If the 3rd Party declines to pay part or all of a claim item, you can either:
- issue a credit to the 3rd Party to write-off the debt, or;
- invoice to the patient for the balance.
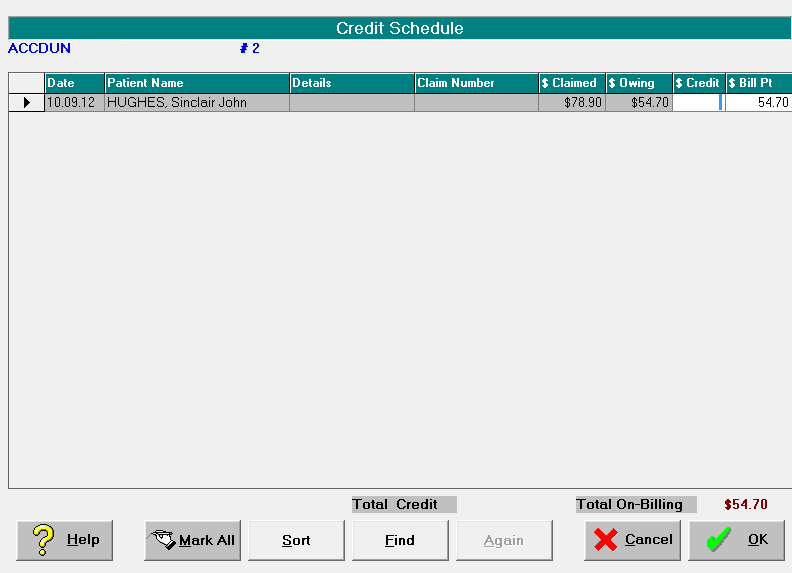
- Highlight the schedule invoice and select 'Credit' from the Toolbar.

- Either
- In the $Credit' column, enter an amount to credit the item, or;
- In the '$ Bill Pt' column, enter the amount to invoice the patient.
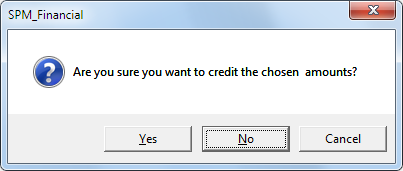
- A message will appear confirming you want to apply the credit.
- If you have chosen to invoice the patient, an invoice for the patient will be automatically generated.

- Once the schedule invoice has been fully paid and all claim items reconciled, it will disappear from the list of schedule invoices.
Advanced
Automatic Reconciliation
It is possible to allow the SPM application to automatically reconcile some types of schedule invoice payments if the 'Remittance Advice' has been provided electronically.
Payments from the following parties allow this to occur:
- ACC
- Medicare (HIC)
ACC Remittance Advice download
- In Internet Explorer go to the ACC eForm site.
- Select 'Query Remittance Advice'
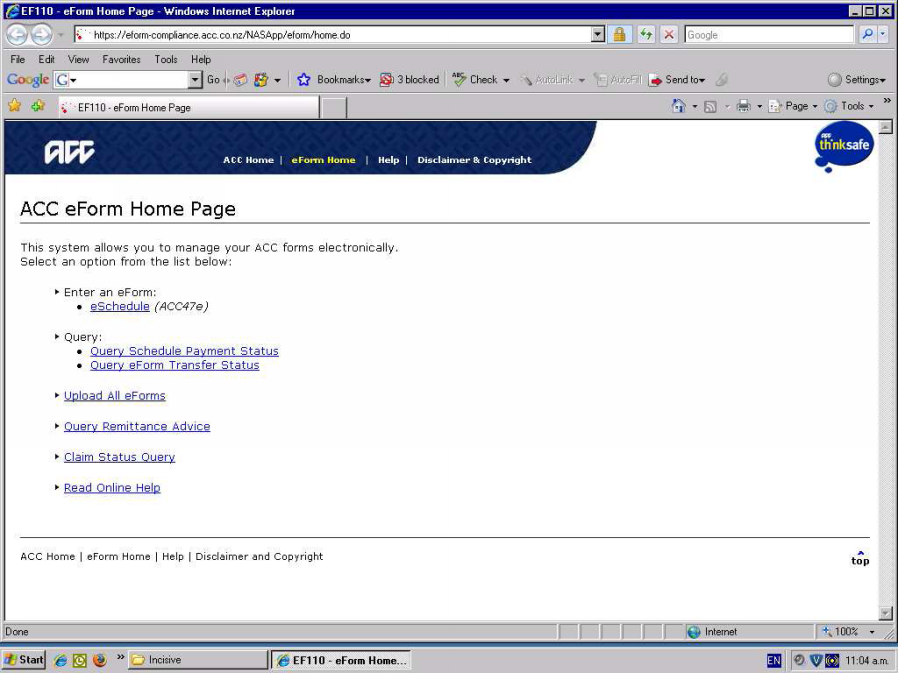
- Download the file (remittance advice) for the day it is required. Save into the ACCSend/Remittance directory.
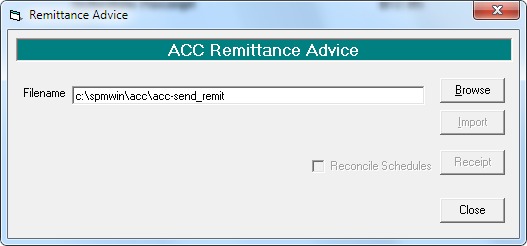
- In Office Receipts click on the 'ACC Advice' button to import & print the Contents

- Browse for the file then click 'Import'
A Remittance Advice report will appear which displays the content of the file. 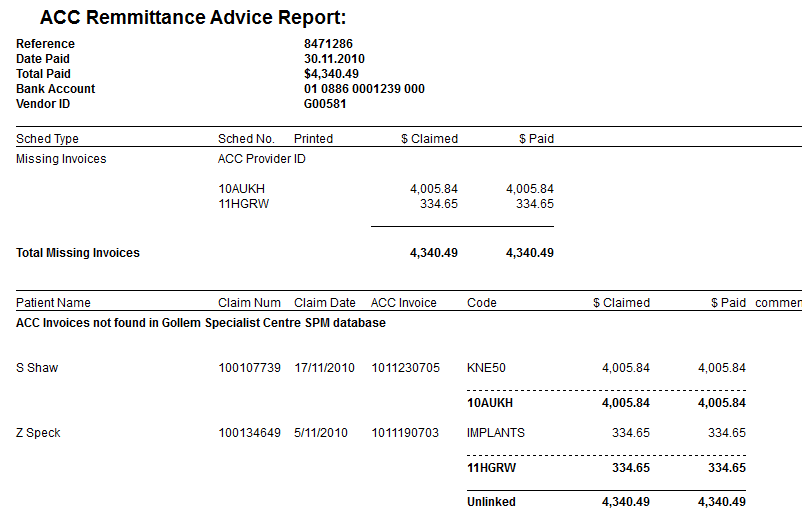
If an invoice has been rejected by ACC (as shown on the remittance advice) delete that invoice in _Office Schedules{_}, make whatever changes are necessary then resubmit. Don't enter it again as the stock will be entered twice.
Auto-reconciling an ACC schedule invoice
- Close the Remittance Advice report. The following screen will appear.
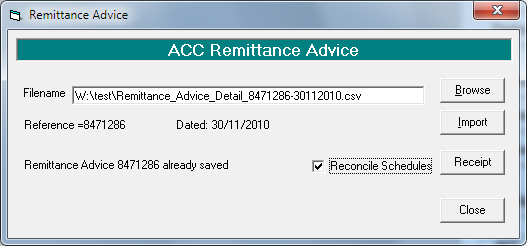
- Ensure the 'Reconcile Schedules' is checked On. Click on the 'Receipt' button.

Automatic receipting and reconciling of HIC Schedules
After running the 'Payment Report' option in _Office Schedules HIC Status_ select from one of the following:
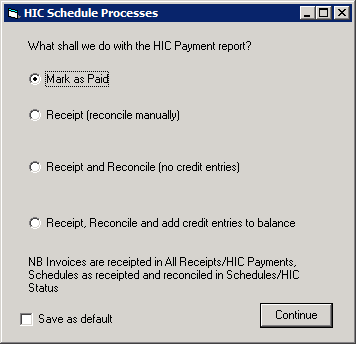
Mark as Paid
This option DOES NOT receipt the schedule, but marks it so that it is not reported on (again) in the HIC Payment Report obtained from Office - All Receipts – HIC Payments.
Receipt (reconcile manually)
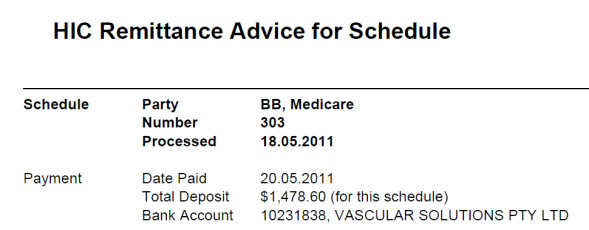
This option will enter a receipt with the date and amount as per the HIC Remittance Advice for the schedule.
You will still need to reconcile the schedule manually based on the information available in the report.
Receipt and reconcile (no credit entries)
This option will enter a receipt with the date and amount as per the HIC Remittance advice for the schedule and in addition to this will reconcile the payment.
If any items have not been paid, or have been partially paid, they will still be left as owing on the schedule. You will need to enter manual credit entries based on the report.
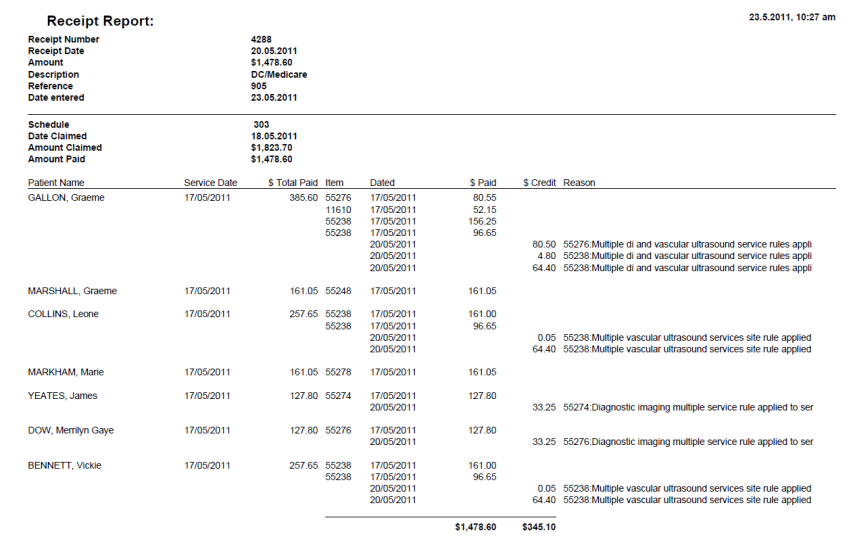
Receipt, Reconcile and add credit entries
This option will enter a receipt with the date and amount as per the HIC Remittance advice for the schedule. It will also reconcile the payments and credit any entries that remain unpaid.
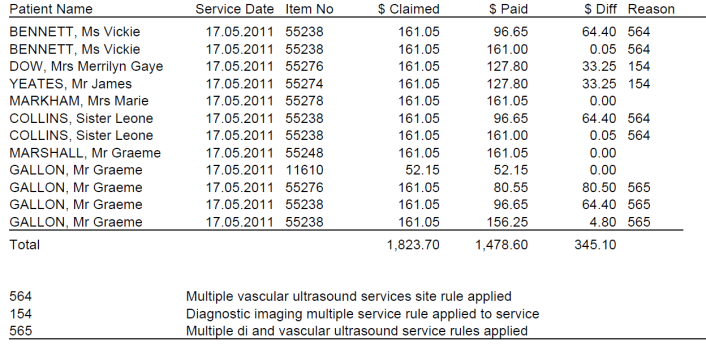
Refer to the Receipt Report to check for items that may need to be reclaimed.
Save as default
Select this if you want the option selected above, saved as your default setting.
Allocate
If you are keeping track of the amounts that you need to pay your sub-contractors for services they have provided you, you can 'Allocate' monies to the sub-contractor as the item is reconciled.
As you are reconciling the list of items, highlight the item and click on the 'Allocate' button which will adjust the sub-contractor reports. 
Acknowledge
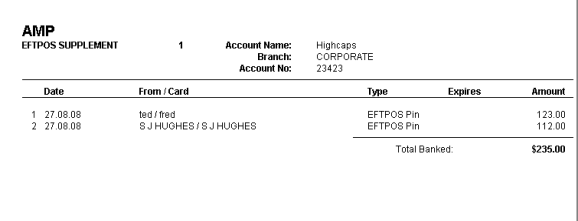
HIGHCAPS
Highcaps is the electronic claiming mechanism for physiotherapists in Australia.
- Select EFTPOS
- Create a bank account called Highcaps, and select it when receipting
- In _Office Banking_ choose Display from the Toolbar and select the Highcaps account.
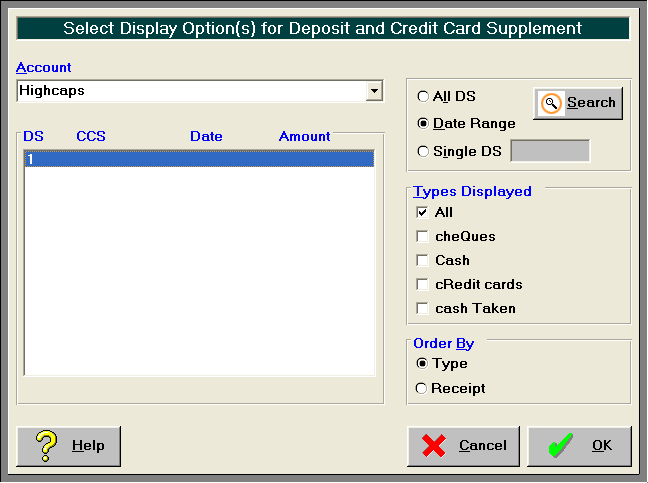
- This will produce a separate banking supplement.