Making a new appointment steps you through a number of screens. Exactly what screens display, will be dependent on the configuration of the Provider Settings , and whether or not the User is configured for a 'Quick Appointment' (see Set-up Provider > User Config). A 'Quick Appointment' bypasses the Referral and ACC screens, but assumes these will be completed when the patient presents.
- Highlight the required time slot.
- Press 'Enter' or Select 'New' (or press F4 to select a patient).
NOTE: If you are double booking a time slot you must use 'New' or F4 as 'Enter' will assume you are wanting to edit the existing booking.
The Patient Selection screen displays. For details on how to select a patient refer to Patient Mode. - Select an Existing Patient or add a New Patient.
The "New Appointment – Patient Registration" screen will display. This is a cut down of the full Patient Registration screen found in Patient Mode.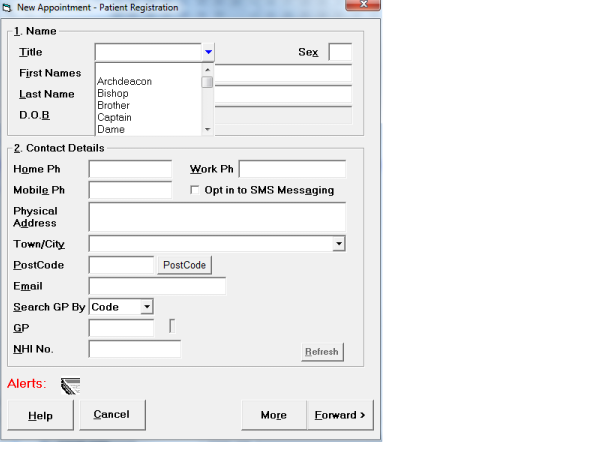
- If the patient is a New Patient, fill in the Name and Contact details of the patient. Refer to Patient Mode for a full explanation of these fields on this screen.
- If the patient is an existing patient and the details have changed since they were last seen, alter the details.
- The 'More' button will give you the complete Patient Registration screen as found in Patient Mode. Select "More' if you want to fill out or 'Edit' any of the other registration details not on the first screen.
- When complete select 'Forward'.
The appointment screen will display.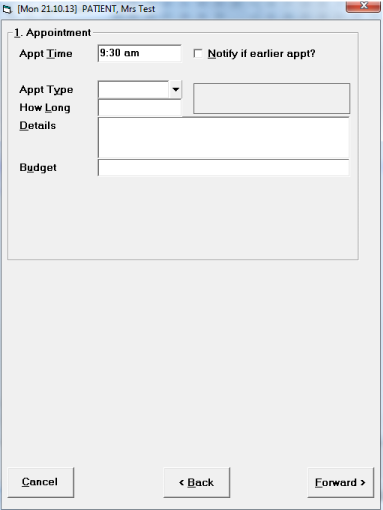
- Press 'Enter' to accept the time, or alter if required.
- If you want to mark the patient for notification of an earlier appointment, tick the box (press the Space Bar).
- Select the appropriate appointment type code (see Set-up > Appointments > Appointment Types).
- Confirm the default appointment length by pressing 'Enter' or type in a different appointment length if required.
- It is intended that the Budget field be used by providers of contract services (eg. ACC). Either enter one or more Budget codes (see Set-up > Appointments > Budget Codes), or ignore if not relevant.
- Select 'Forward'.