There is a function in SPM to order Laboratory, Radiology, Physiotherapy or any other type of request. The order is logged against the patient and a printout can be generated to attach to the Laboratory, Radiology or Physiotherapy practice requisition form.
A set of standard tests is already in the database. Each Specialist can choose the tests they will frequently use. Templates can be created for standard groups of tests e.g. preop assessment, renal screening, and antenatal screening. Additional non-standard tests can be added to the master list. Each practice can nominate the Laboratories, Radiology, Physiotherapy practices use and the requisition will be addressed to the appropriate site.
Receipt of test results, received either electronically or manually, are marked off against the ordered tests. A report is available to indicate any results that have not been received.
Patient Mode
Order requests are created in the patient’s file.
- F4 to select the Patient, go to the Notes tab and select the Order Test button.
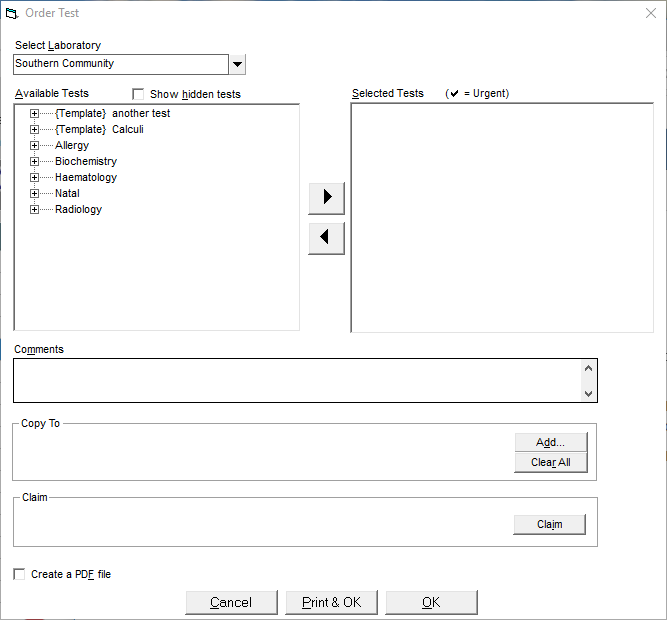
- Choose the Laboratory, Radiology or Physiotherapy practice from the drop down list.
- Select the appropriate tests or test templates and move them across to the Selected Test box on the right. If further tests are required and are not listed then tick the Show hidden tests option.
Complete the required fields and Print & OK.
NB: Frequently used text can be created as an F8 code in Setup mode. If the patient has more than one ACC Claim, there is an option to select the appropriate claim.
Tests Ordered now appear on the Notes tab for that Patient. 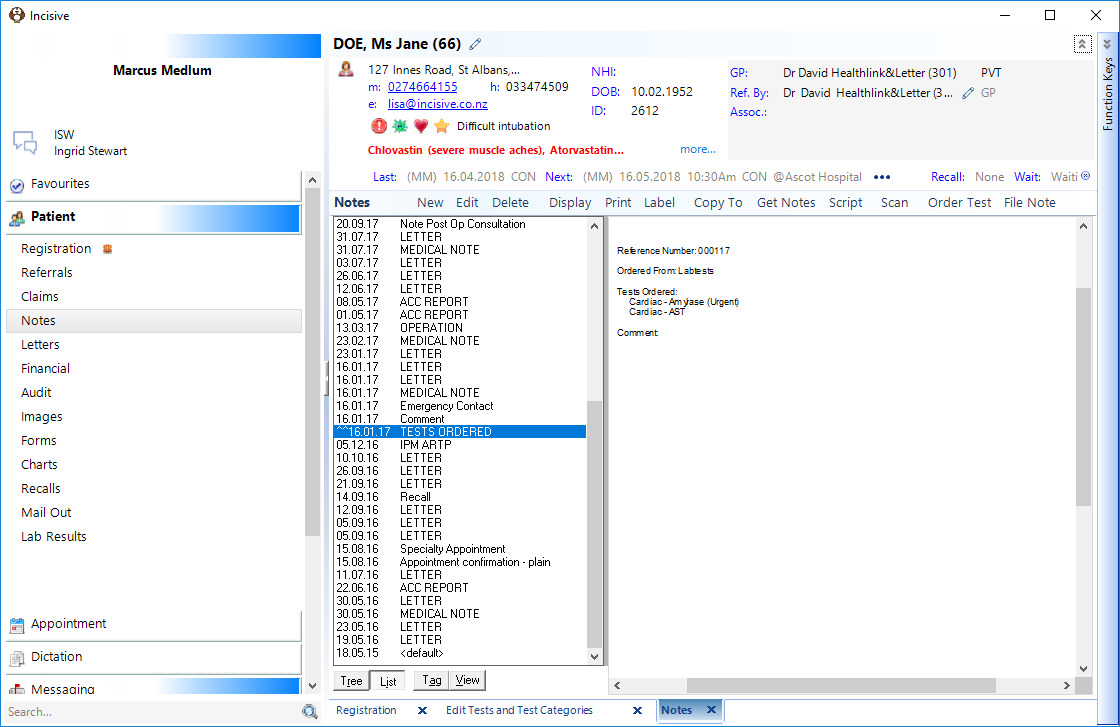
Set Up
Laboratories
Any entity that completes your order would get listed as a ‘laboratory’ (even if they are not). So Physio or other therapists would need to be listed here as well.
To add a new Laboratory go to Setup - Selection Lists - Laboratories - New
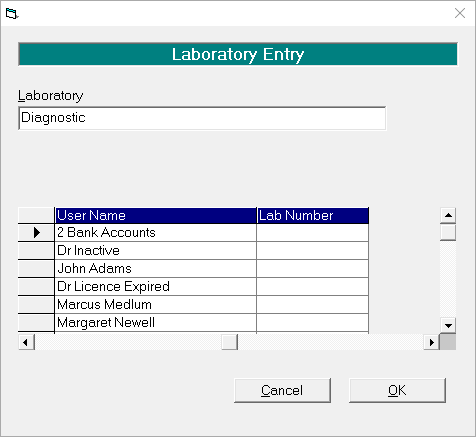
- Enter the name of the Laboratory, Radiology or Physiotherapy Practice.
If you are required to list a reference number, add in the Lab number field.
Add new entries until you have all the sites you use.
Tests and Test Categories
A list of standard tests and test categories is supplied in the Incisive database. If you wish to add to this, you can do so. The additions to this are system-wide and will be accessible to all providers if they select the test as visible.
Adding a new Category
A Category is just the first level of the order selection tree under which you want to group a selection of test order items.
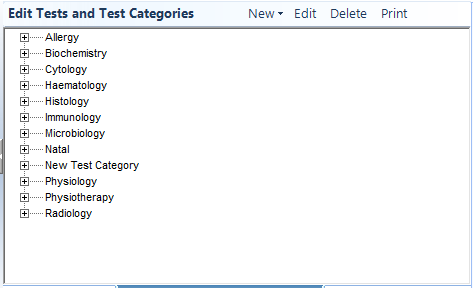
- Click on Setup - Selection Lists - Test Items & Categories.
- Click on New then select Category and type in the name of the Category. Click OK to complete.
Adding a new Test item
A Test Item is a term used to describe each individual type of order you would use.
- Go to Setup - Selection Lists - Tests and Test Categories.
- Highlight the Category that you want the new test to be displayed within
- Select New then Test.
- Type in the name of the new test.
- Use the ‘Follow-up Required’ checkbox to select whether you want to reconcile the any order created using this test, with incoming electronic results. For therapy related orders you would not have this checked whereas for oncology related test you possibly would.
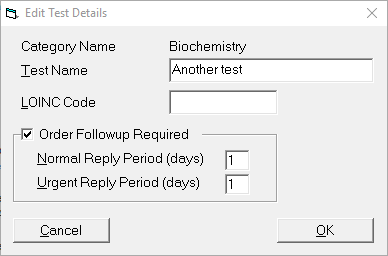
If checked on:
- Normal Reply Period is the number of days you would expect to receive a test result back, that wasn’t marked as Urgent
- Urgent Reply Period is the number of days you would expect to receive a test result back if it was marked as Urgent.
Templates
Templates are just collections of individual tests that you often request to be completed at the same time e.g. Antenatal bloods. Rather than choose each individual test you can instead choose the template and it will apply all of the tests to the order.
You can build your own templates and each test can be allocated to more than one template.
- Go to Setup - Test Orders - Test Templates.
- Select New and enter a title for the Template.
- Select and transfer the tests that you want included on the template then click OK.
Templates will always display at the top of the list of the Provider’s ‘favourite’ tests.
Visible Test
For each Provider you can select a list of the more commonly used tests that they use. This list is the default display when using the option in Patient mode. You can choose the ‘Show All’ option to get the whole list.
- Choose the correct Provider (F2).
- Go to Setup - Test Orders - Visible Tests.
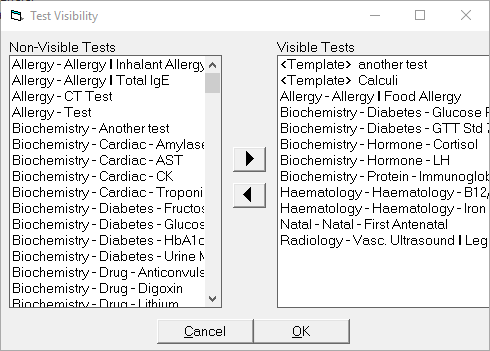
- Scroll the list on the Left, select the Category and Test and move to the Visible Tests list. A test may be selected by highlighting it and using the right arrow. A number of tests may be selected by Ctrl + Left mouse click and then use the right arrow to add these tests to your visible tests. OK to save.
Results
Reconciling Tests ordered with received Results
Each Test item is able to be marked as requiring a follow-up reply which means that the when the test is ordered it needs to be reconciled with the incoming results and marked off that it has been received.
This allows you to trace and identify if the patient has not presented for the test or that the lab has not provided you with the result.
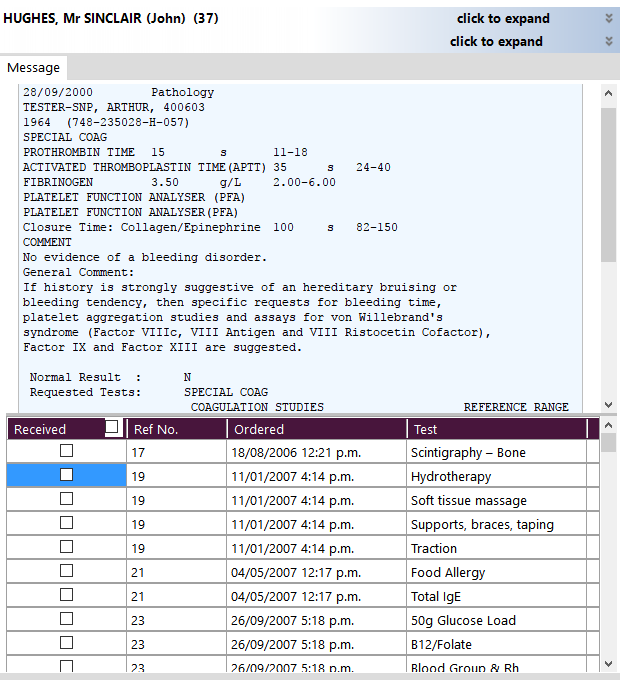
If any tests ordered for a patient require this follow-up the original test ordered will appear at the bottom of the Message Content panel and can be marked off as having been received when the result is viewed.
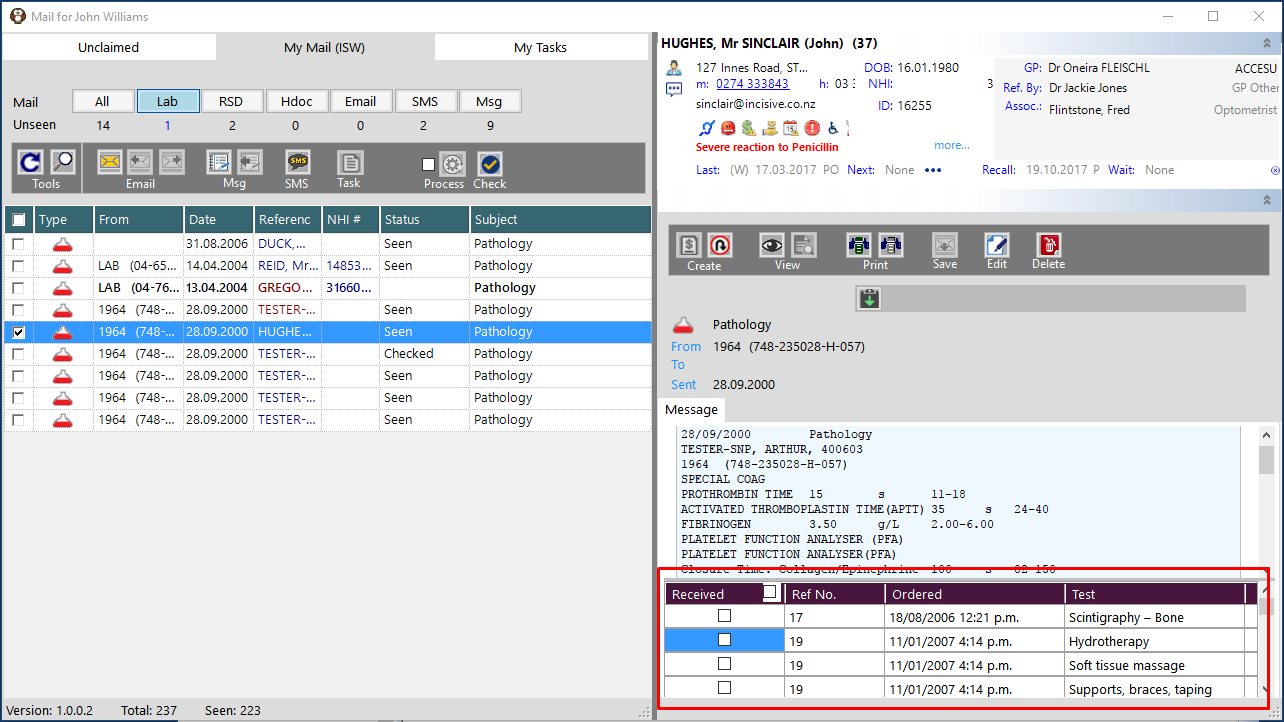
If there is a large list of tests ordered you can drag the horizontal divider bar higher to expand the space available and also collapse the Patient Details pane and the Actions pane by clicking on the chevron symbol 
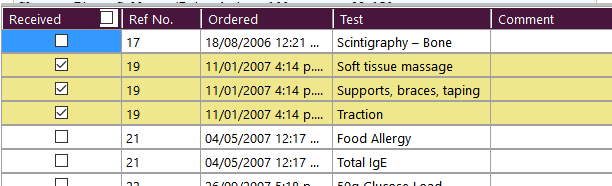
As you select the Ordered Tests to mark them as Received the rows will be shaded a light yellow colour and will disappear when the results are processed.
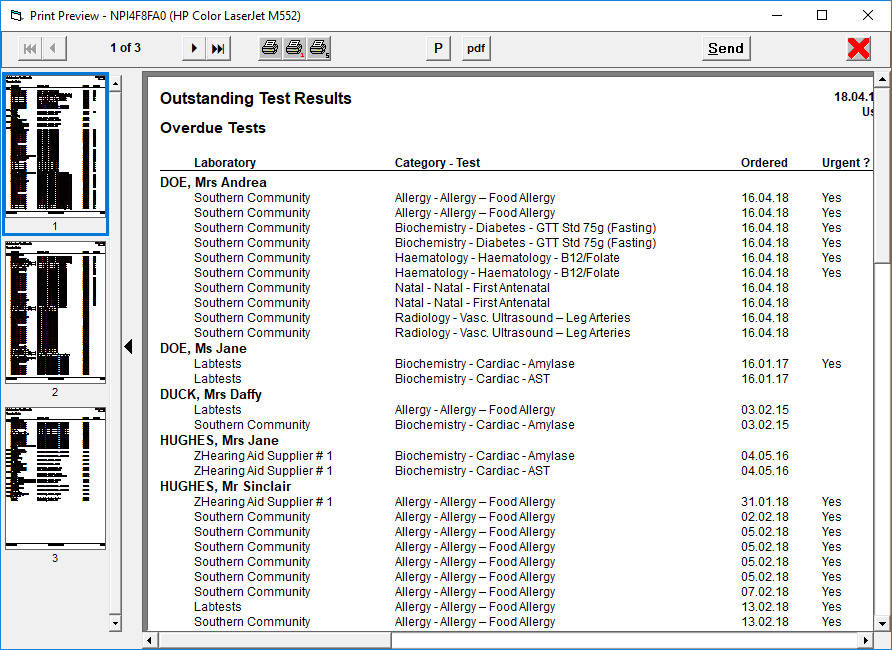
Reports
To check you have received all your outstanding results you can go to Reports - Management - Test Results Outstanding which will give you a full list of overdue and outstanding test results.